While PowerPoint does not have a separate Timelines category for SmartArt graphics, you can still find some timeline variants hidden within the Process category. Of course, if you are using PowerPoint 365 for Windows, you can also use the Design Ideas Task Pane to create timelines from bulleted lists.
Follow these steps to insert timelines using the SmartArt graphics option in PowerPoint 365 for Windows:
- Launch PowerPoint 365 for Windows. You will see the Presentation Gallery. Here, select the Blank Presentation option to create a new, blank presentation with an empty slide. Change the layout of this slide to Title and Content by selecting the Home tab | Layout | Title and Content option.
- Doing so results in a new slide with the chosen slide layout, as shown in Figure 1, below.
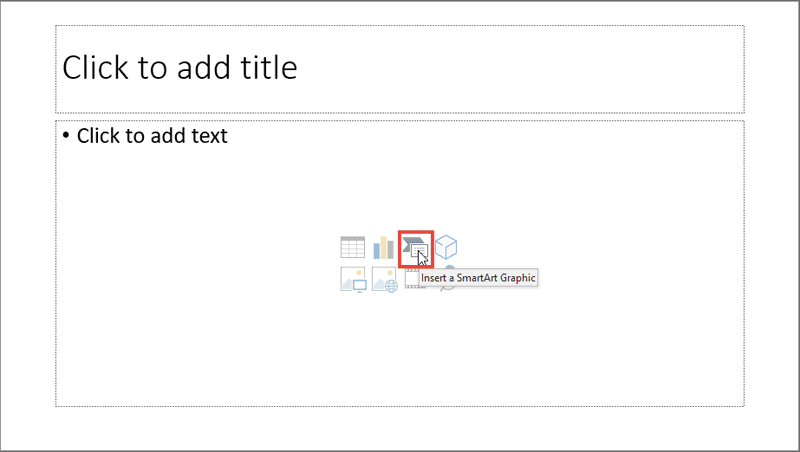
Figure 1: Insert a SmartArt Graphic button within Content placeholder - Notice that this layout has a Content placeholder that lets you add bulleted text or any of the many content types in the slide. These content types are indicated by the various buttons located right in the center of the Content placeholder, as shown in Figure 1, above. Click on the Insert a SmartArt Graphic button in the content placeholder, as shown highlighted in red within Figure 1, above.
- Alternatively, if you want to add a Timeline SmartArt graphic on an existing slide that has no content placeholder, you can select the Insert tab of the Ribbon, and click the SmartArt button, as shown highlighted in red within Figure 2, below.

Figure 2: SmartArt button within the Insert tab - Either way, you summon the Choose a SmartArt Graphic dialog box, as shown in Figure 3, below. Click the Process category in the sidebar, as shown highlighted in red within Figure 3. Then, from the options available in this category, select one of the two available timeline layouts, as shown highlighted in blue within Figure 3.
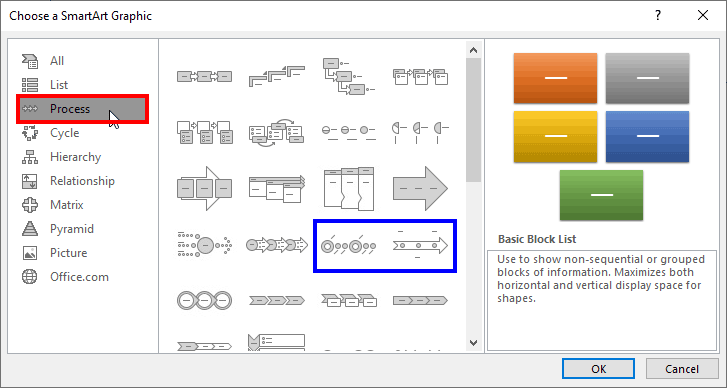
Figure 3: Choose a SmartArt Graphic dialog box - The two Timeline SmartArt graphics within the Choose a SmartArt Graphic dialog box are Basic Timeline and Circle Accent Timeline, but you can also use almost any process-related SmartArt graphic. For this tutorial, we are using the Basic Timeline graphic, as shown highlighted in red within Figure 4, below. Select it and then click the OK button, as shown highlighted in blue within Figure 4, below.
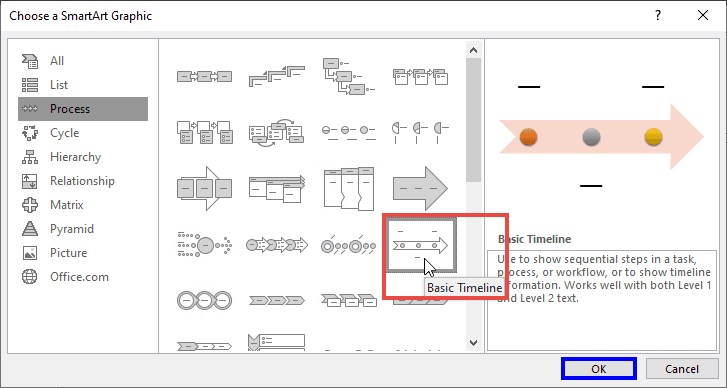
Figure 4: Basic Timeline SmartArt graphic selected - This action will add the selected graphic to the slide, as shown in Figure 5, below. Notice the Text Pane, as shown highlighted in red within Figure 5.
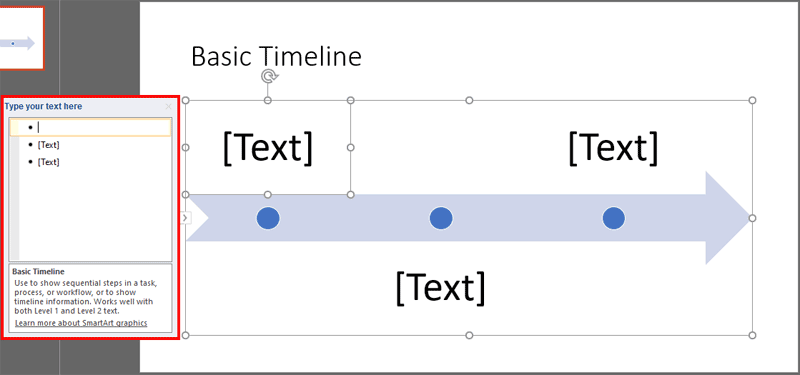
Figure 5: Basic Timeline SmartArt graphic added on the slide - Within the Text Pane, type in or paste text you want to add within the SmartArt graphic. You can also type in text within the shapes in the SmartArt graphic. Figure 6, below, shows text added within the Basic Timeline graphic.
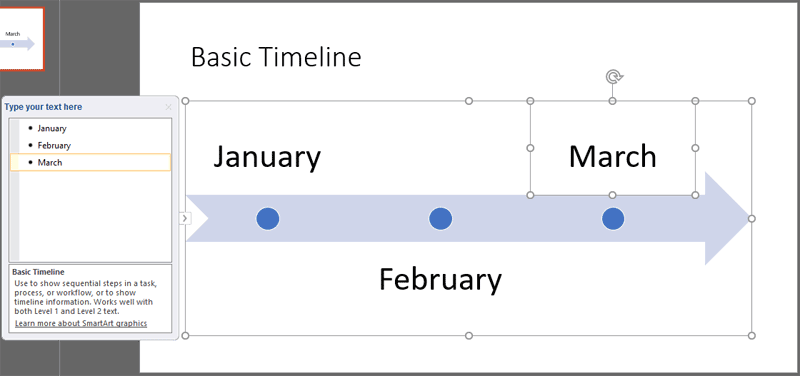
Figure 6: Text added within the Basic Timeline SmartArt graphic
No Text Pane for SmartArt
- Is there no Text Pane visible, as shown in Figure 7, below?
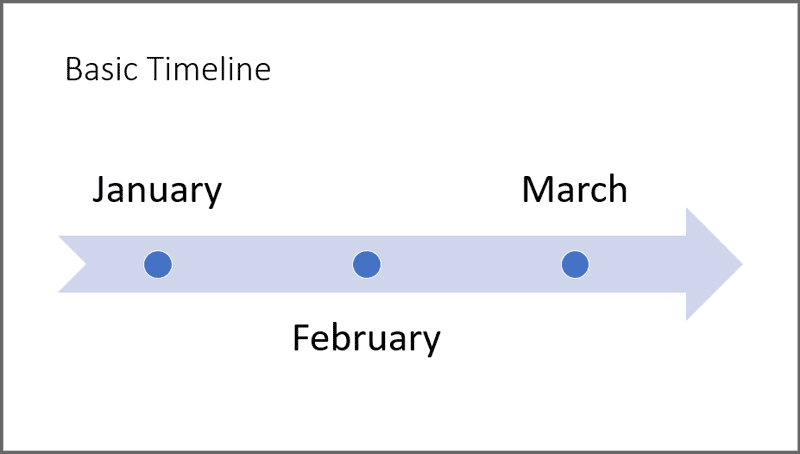
Figure 7: Where's the Text Pane? - The Text Pane is not visible because you need to take the following two steps to bring it up:
- First, select your SmartArt graphic, if it not selected.
- If the Text Pane does not automatically show, click the small Text Pane button on the left, as shown magnified in red within Figure 8, below. Doing so will reveal the collapsed Text Pane.
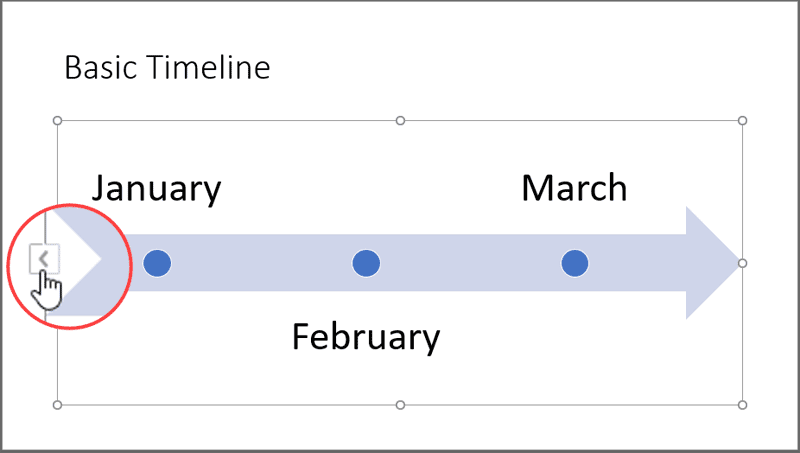
Figure 8: Text Pane button
- Add, delete or edit the text as needed within the Text Pane. To add text in the Text Pane, press the Enter key after the previous time-stop, and type your text. To delete text, select the entire time-stop in the Text Pane, and press either the Delete or the Backspace keys. To edit text, select the text in the Text Pane, and type in new text.
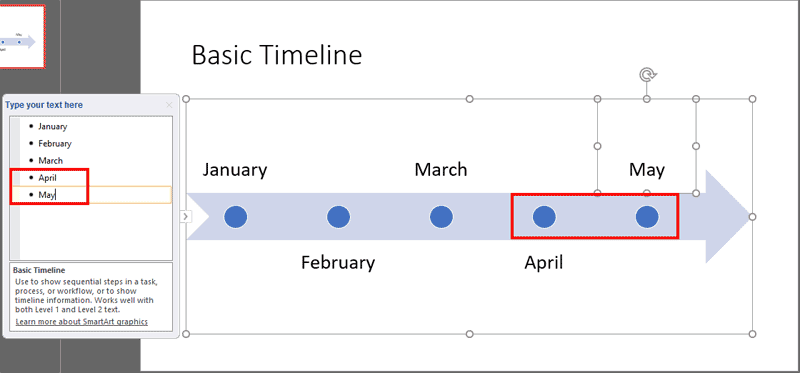
Figure 9: Adding extra time-stop - Notice that we added two more time-stops in the Text Pane, as shown highlighted in red within Figure 9, above. You'll also notice that shapes representing these time-stops were simultaneously added to the timeline SmartArt graphic, as shown highlighted in red again within Figure 9.
- Save your presentation often.


