When you add clip media within the Clip Organizer, you need to select an existing Collection. There are some prerequisites though. You can only add your own media to the My Collections folder, or any Collection you create as sub-folders with the My Collections folder. A Collection is just like a folder in which you save files.Taking the folder analogy further, you can also create Collections within the My Collections folder. Later you can rename, move, and delete a Collection altogether.
Follow these steps to learn how to create and organize collections within the Clip Organizer in PowerPoint 2010 for Windows:
- Launch Microsoft Clip Organizer. By default the Collection List pane is opened within the Clip Organizer, as shown in Figure 1.
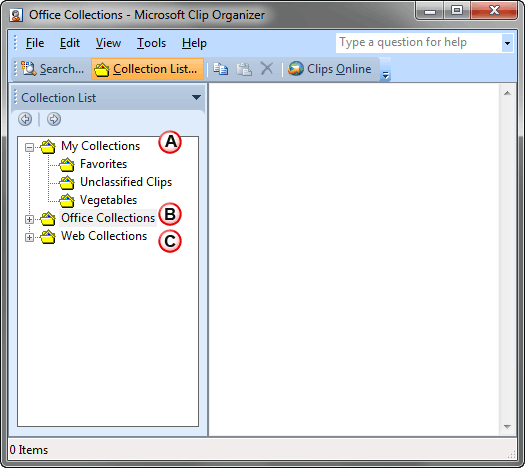
Figure 1: Collection List pane - Within the Collections List pane you'll find a list of all the collections. Components of this list are is explained below, as marked in Figure 1, above:
A. My Collections
- This is a top-level folder, it also contains sub-folders. All new Collections you create will get added within this folder as sub-folders. You can also add clip media within this folder.
B. Office Collections
- This folder contains media clips from Office which are stored on your system, as shown in Figure 2.
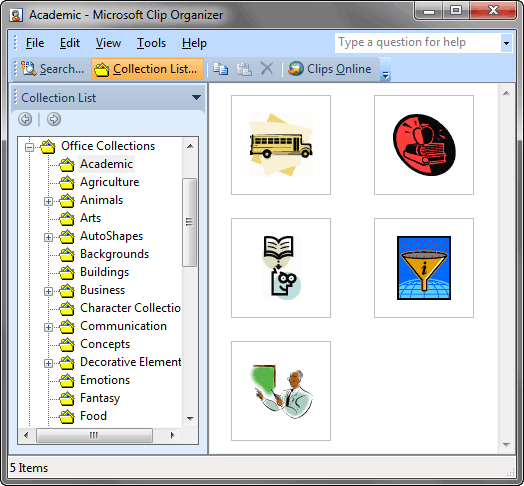
Figure 2: Office Collections C. Web Collections
- This folder is used to show online media clips. This option doesn't work any more.
- To add a new collection, select My Collections folder or any sub-folders within it. Right-click on the folder to bring up a contextual menu, as shown in Figure 3.
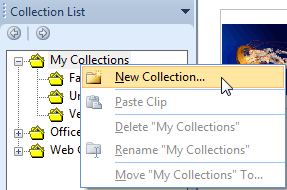
Figure 3: New Collection option - Alternatively, select the File | New Collection menu option, as shown in Figure 4.
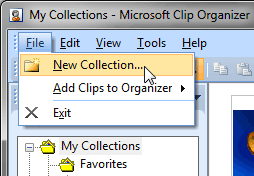
Figure 4: New Collection option within the File menu Note: If you select My Collections folder and add a new collection, it will be added as its sub-folder. On the other hand if you select any of the sub-folder and add a new collection it will be added as sub-folder within the selected sub-folder.
- This opens the New Collection dialog box, as shown in Figure 5. Here, provide the name to your collection. We typed "Flowers" (shown highlighted in red within Figure 5), and then clicked the OK button, as shown highlighted in blue within Figure 5.
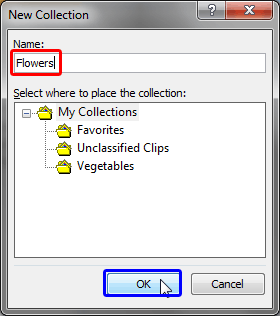
Figure 5: New Collection dialog box - This will add the new collection, as shown highlighted in red within Figure 6.
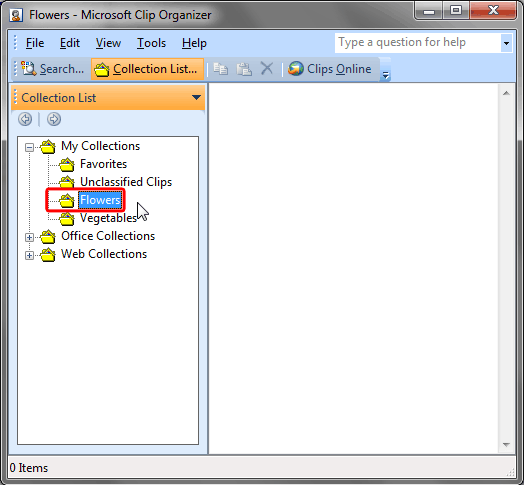
Figure 6: New collection added - To get more options, right-click on the folder to bring up a contextual menu, as shown in Figure 7.
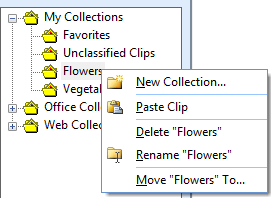
Figure 7: Right-click contextual menu - Here you'll find options to: Delete, Rename, and Move the selected collection folder. These options are explained below:
Delete
- Once you delete, you will see a warning message, as shown in Figure 8, below. Press the Yes or No button, as required.

Figure 8: Delete a Collection folder? Rename
- Highlights the Collection name so that you can overtype a new name (see Figure 9, below).
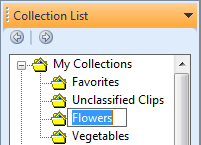
Figure 9: Type a new name Move
- Opens Move to Collection dialog box as shown in Figure 10, below. Within this dialog box, select the destination Collection folder within which you want to move the selected Collection folder. Thereafter, click the OK button.
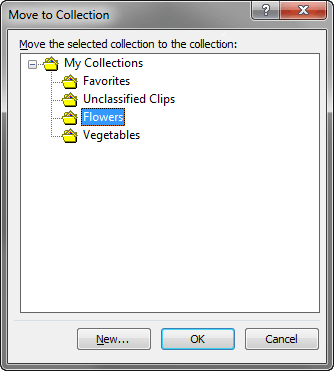
Figure 10: Move your Collection folder - Make new Collections or edit them as required.


