Indezine Logo


Exporting Word Handouts in PowerPoint 2013 for Windows

Learn how to export handouts to Microsoft Word in PowerPoint 2013 for Windows. The exported handouts can be with or without notes, and include slide thumbnails.


Author:

Product/Version: PowerPoint 2013 for Windows

OS: Microsoft Windows 7 and higher


Learn PowerPoint

Learn about self-closing PowerPoint presentations.


You may create the best presentation in the world, but what happens after the presentation has been delivered? Don't you want to provide the content of the presentation in a document that you can distribute to attendees, or even send them a recap via email? Handouts are meant for such occasions, and PowerPoint lets you create some amazing handouts from your slides that can also contain extra notes that were not visible on the slides. In this tutorial, we will explore an amazing option that creates handouts for PowerPoint presentations in Microsoft Word.

Follow these steps to create handouts in Word from PowerPoint 2013 for Windows:
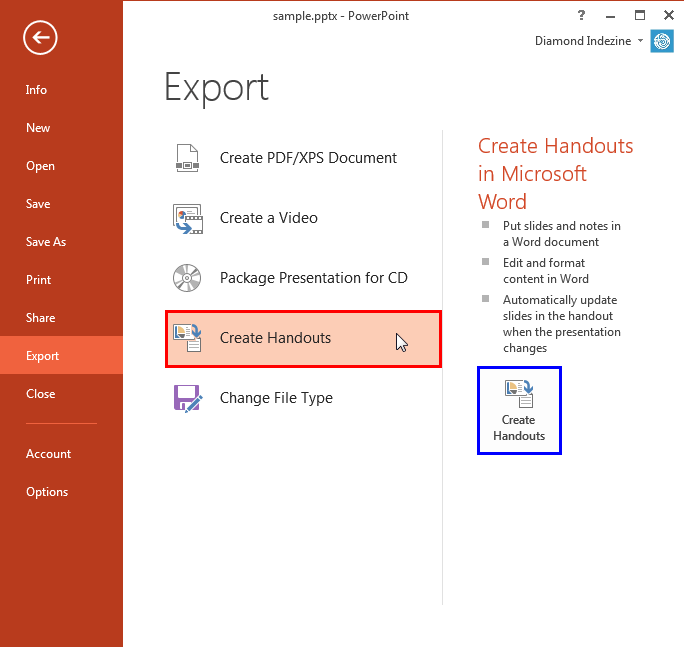
  1. Make sure your individual slides have notes within the Notes Pane. Save your presentation. Then, access the File menu to bring up Backstage view. Select the Export tab to bring up options, as shown in Figure 1, below. Click the Create Handouts option, as shown highlighted in red within Figure 1. You will now see the Create Handouts button, as shown highlighted in blue within Figure 1. Click this button.
  2. Create Handouts button
    Figure 1: Create Handouts button
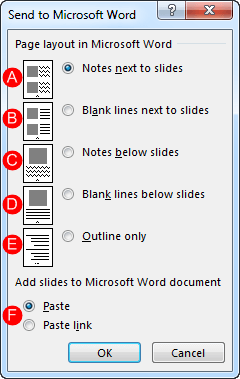
  3. Doing so will bring up the Send to Microsoft Word dialog box, as shown in Figure 2, below.
  4. Send to Microsoft Word dialog box
    Figure 2: Send to Microsoft Word dialog box
  5. We will now explore options available within this dialog box, as marked in Figure 2, above:
  6. A. Notes next to slides

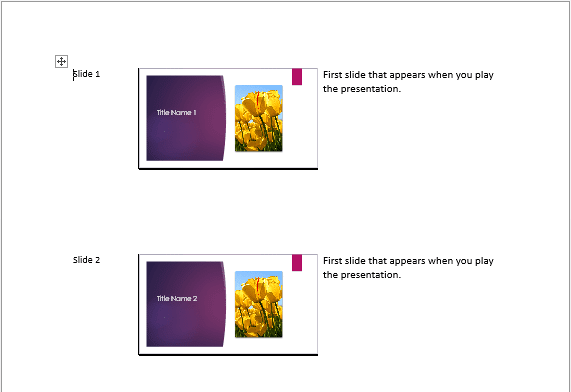
  7. Places your slide notes next to a slide thumbnail, as shown in Figure 3, below. Depending upon the length of your notes, 1 to 3 slides are placed on each Handout page.
  8. Notes next to slides
    Figure 3: Notes next to slides
  9. B. Blank lines next to slides

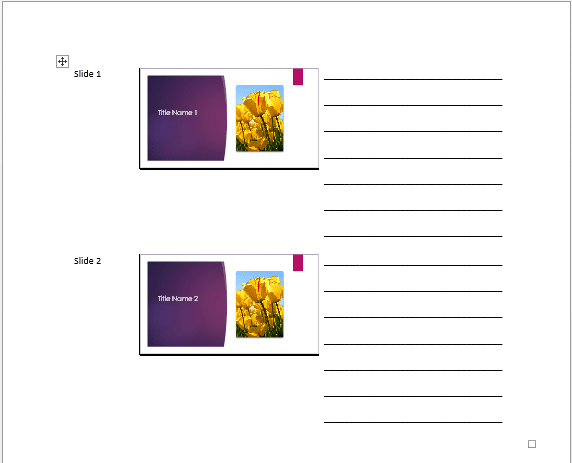
  10. Places some blank lines next to a slide thumbnail, as shown in Figure 4, below. The blank lines will allow recipients and attendees to jot down some of their own notes, as needed. Three slide thumbnails with blank lines are placed on each Handout page.
  11. Blank lines next to slides
    Figure 4: Blank lines next to slides
  12. C. Notes below slides

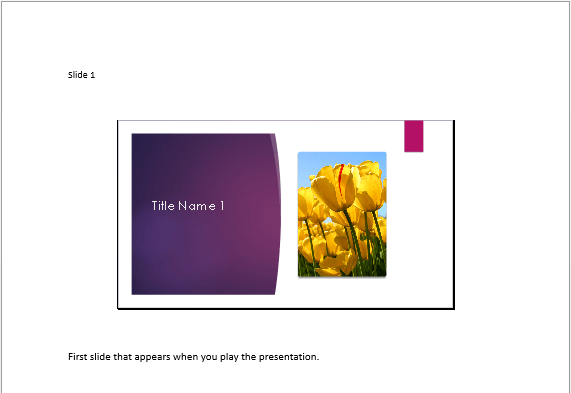
  13. Places a single large slide thumbnail and related slide notes beneath the thumbnail, as shown in Figure 5, below. One slide is shown in each Handout page.
  14. Notes below slides
    Figure 5: Notes below slides
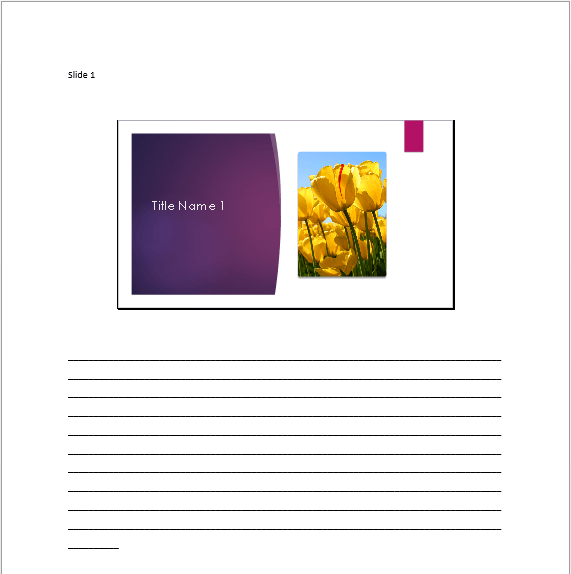
  15. D. Blank lines below slides

  16. Places a single large slide thumbnail and blank lines beneath the thumbnail, as shown in Figure 6, below. One slide is shown in each Handout page.
  17. Blank lines below slides
    Figure 6: Blank lines below slides
  18. E. Outlines only

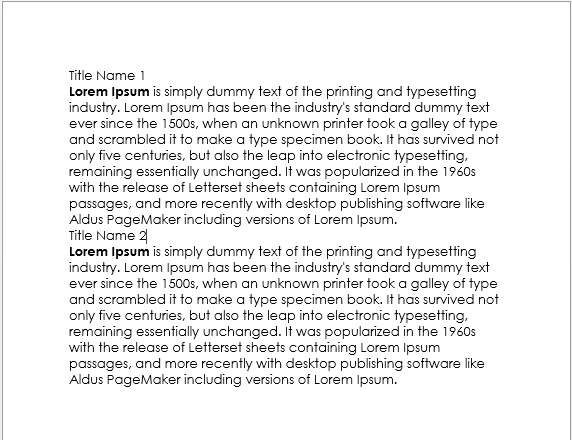
  19. Places the outline of the slides, do note that outlines only include textual content from the Title and Content placeholders. Also, the fonts used in the slides are used in Microsoft Word too. You may want to change fonts in Word, especially if you have a fancy-looking font, as shown in Figure 7, below.
  20. Outlines only
    Figure 7: Outlines only
  21. F. Add slides to Microsoft Word document

  22. You see two radio buttons within this section, and only one of these can be selected.
  23. Paste

  24. Creates the outlines in Microsoft Word as a one-time exercise. Changes in your PowerPoint slides are not reflected in the Handout Word document.
  25. Paste link

  26. Creates the outlines in Microsoft Word as a linked document. Changes in your PowerPoint slides are reflected in the Handout Word document.

Once the Handout document loads in Word, you must save it, ideally within the same folder as the PowerPoint presentation, as explained in our Guidelines: Using Excel and PowerPoint Together tutorial. Although the linked article pertains to using PowerPoint and Excel together, the same concepts also work when you use PowerPoint and Word together.


See Also:

16 01 04 - Prepare for Sharing: Exporting Word Handouts in PowerPoint (Glossary Page)

Exporting Word Handouts in PowerPoint 2016 for Windows
Exporting Word Handouts in PowerPoint 2010 for Windows

You May Also Like: Make A Connection with Your Audience Through Questions | Hazelnuts PowerPoint Templates


Popular Posts

Text Box Autofit Options in PowerPoint 2016 for Windows
Learn about Text Box autofit options in PowerPoint 2016.

Paste in Place in PowerPoint
How can you place a copied or duplicated slide object right on top of the original object in PowerPoint?

Formatting Arrows (Arrowheads) in PowerPoint 2013 for Windows
Learn how to format arrowheads for lines in PowerPoint 2013 for Windows.

Changing Location of Slide Numbers in PowerPoint 2010
Learn how to change location of slide numbers in PowerPoint 2010.


Polygon Center Circles for PowerPoint

These special circles have polygon centers: the centers are made of triangles, squares, pentagons, and hexagons! And based on the sides of the polygon, the rest of the circle has that many segments.

Download and use these Polygon Center Circles in your slides for just $4.99


Microsoft and the Office logo are trademarks or registered trademarks of Microsoft Corporation in the United States and/or other countries.

Home | PowerPoint | Photoshop | PowerPoint Templates | PowerPoint Tutorials | Blog | Notes | Ezine | Media Kit | Feedback | Site Map | About Us | Contact Us

Link to Us | Privacy | Testimonials

PowerPoint Backgrounds | Christian PowerPoint Backgrounds | Business PowerPoint Presentation Templates

Plagiarism will be detected by Copyscape

©2000-2023, . All rights reserved.