PowerPoint provides a default spelling dictionary which contains a list of all common words. But, when you are working on a
particular project that uses uncommon words not found in everyday language, PowerPoint may mark some words as misspelled, even
though they are correct. To solve this issue, you could
edit a custom dictionary or
load a ready-made 3rd party
dictionary within PowerPoint 2011 for Mac. Additionally, you can also
create your own dictionary that includes a set of words for a particular project. So, if you need to do a legal presentation for
a client once a year, you could create a separate dictionary for just this one project.
Note: Many of these tasks cannot be done within PowerPoint. In fact, you need to do these tasks in Word.
Fortunately though, any changes made within Word reflect within PowerPoint as well. Most techniques explained in this page
therefore pertain to both PowerPoint and Word.
Follow these steps to create a new dictionary and edit it:
- Launch Word 2011 if it is not already open, and choose the Word | Preferences menu option,
as shown in Figure 1.
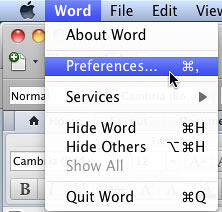
Figure 1: Choose Word | Preferences menu option
- This opens the Word Preferences dialog box. Select the Spelling and Grammar option that
you can see highlighted in red within Figure 2.
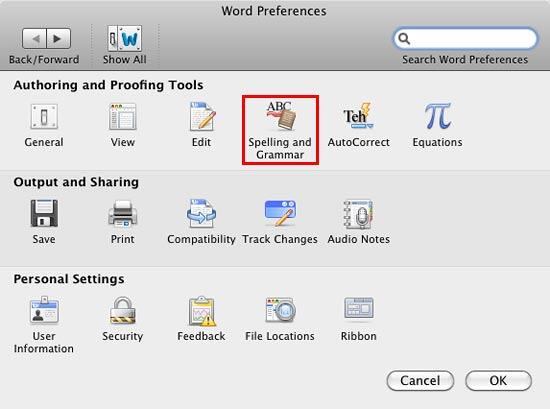
Figure 2: Spelling and Grammar option within Word Preferences dialog box
- This opens the Spelling and Grammar dialog box. In this dialog box, click on the
Dictionaries button (highlighted in red within Figure 3).
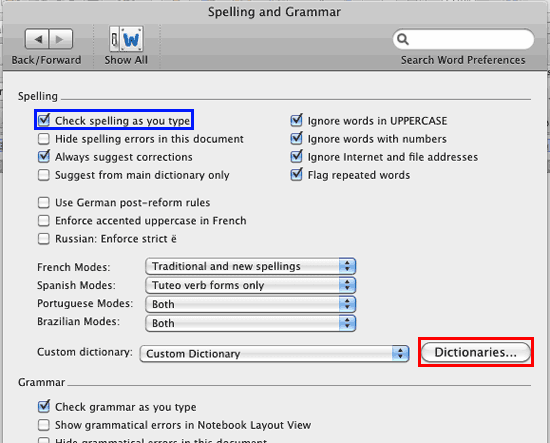
Figure 3: Spelling and Grammar dialog box
- This summons the Custom Dictionaries dialog box as shown in Figure 4. Note that there is
only one custom dictionary at this point of time, not surprisingly named Custom Dictionary.
Within the Custom Dictionaries dialog box, click the New button (highlighted in
red within Figure 4).
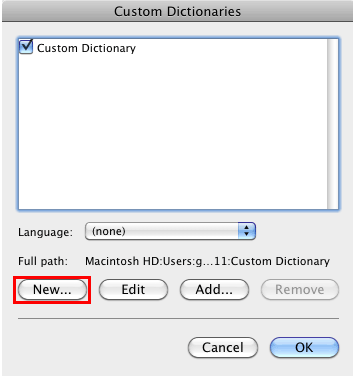
Figure 4: New button within Custom Dictionaries dialog box
- This brings up the New Dictionary dialog box with the default custom dictionary location, as shown in
Figure 5. Within the Save As section highlighted in red within
Figure 5 you will see the default name 'Custom Dictionary'. Overwrite it with a new name for your dictionary.
Optionally navigate to the location where you want to save the dictionary, or create a new folder to save your new dictionary by
clicking the New Folder button (highlighted in blue within
Figure 5). Then click the Save button.
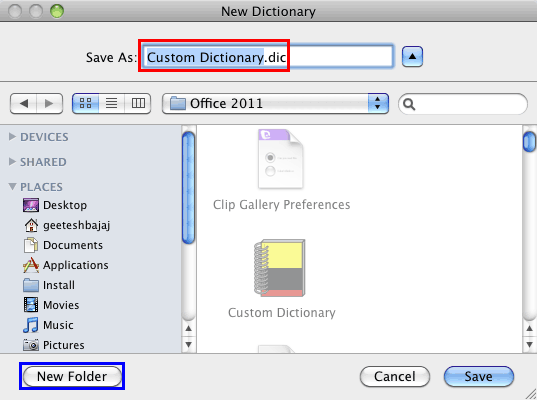
Figure 5: New Dictionary dialog box
- The locations where you want to store the dictionaries depends on who you want to access it:
- To make the dictionary accessible to only the current Mac user, store it in the default custom dictionary location:
- Office 2011 on Mac OS X: Macintosh HD:Users:<username>:Library-Application
Support:Microsoft:Office:Preferences:Office 2011
- If you don’t want to save in user-specific folders to make the dictionary accessible to all users of your
Mac, create a new folder anywhere on your computer, and store dictionaries there.
- This adds the new dictionary to the list within the Custom Dictionaries dialog box, as shown
highlighted in red within Figure 6. Notice that we have named our dictionary
'legal-dictionary.dic'.
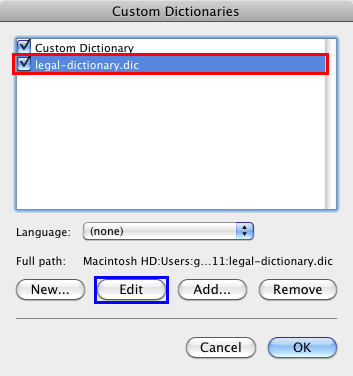
Figure 6: New dictionary added to the Dictionary List
- At this point of time, your new dictionary has no words added. To start adding words, click the Edit button
(highlighted in blue within Figure 6 above).
- This will open a message window as shown in Figure 7. This is to inform you that after editing
the dictionary you need to enable the Check spelling as you type option. Click the OK
button here.
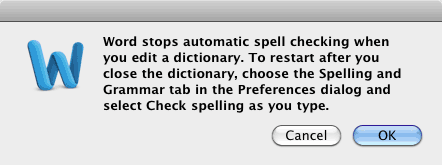
Figure 7: Message window
Note: When you click the OK button within the message window shown in Figure 7
above, the Check spelling as you type check-box gets deselected within the Spelling and Grammar
dialog box. Make sure you select the Check spelling as you type check-box (highlighted in
blue within Figure 3, earlier in this page) after you finish editing your custom
dictionary.
- This will open the new dictionary within Word as a normal Word document, as shown in Figure 8. Notice the
name of the new dictionary (highlighted in red within Figure 8). Type in the words
one below the other, as shown highlighted in blue within Figure 8.
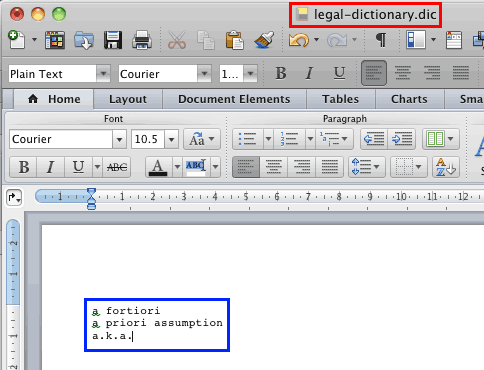
Figure 8: Make entries into the new dictionary
- Once done, save the changes by selecting File | Save menu option as shown in
Figure 9, or using the ⌘ + S keyboard shortcut.
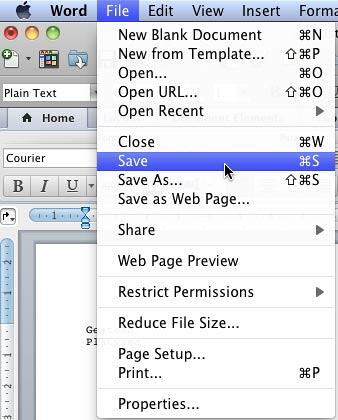
Figure 9: Save the new dictionary after editing
- This opens a window asking for confirmation as shown in Figure 10. Click Yes to continue.
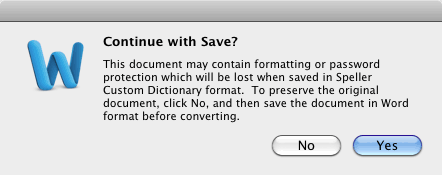
Figure 10: Confirmation to save your new dictionary
- Now, launch PowerPoint and open the Spelling dialog box. Here you can see the new dictionary
within the Add words to section, as shown highlighted in red within
Figure 11.
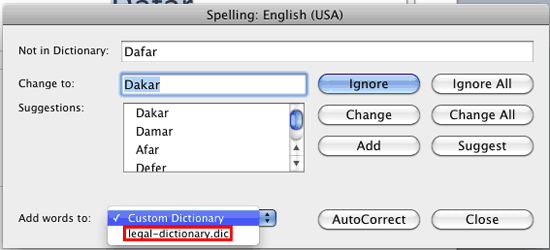
Figure 11: New dictionary within Spelling dialog box
- Since this new dictionary is already loaded into PowerPoint, you will find that any new words you added to the dictionary are
no longer flagged as misspelled. Also do remember that all loaded dictionaries are shared by all Microsoft Office programs such
as Word, Excel, PowerPoint, Outlook, etc.


