Do you want your pictures to be contained within shapes that look like frames? Or maybe you want to use silhouette
style placeholders for your pictures? Yes, this is possible! In fact, look at Figure 1, below.
These custom picture placeholders were created within PowerPoint
2016, and we used nothing that's not part of the program. Yes, this process is a little involved. However, we'll
hold your hand if you promise to follow all our steps in sequence!

Figure 1: Custom picture placeholders
We have already covered how PowerPoint enables you to
insert placeholders within a
Slide Layout. Picture
placeholders are one among the various placeholders you can insert. You can do more with them to create custom
placeholders, as shown in Figure 1, above. We used PowerPoint's
Merge Shapes commands. Thereafter,
follow these steps to learn more:
- First, add a new Slide Layout
within the Slide Master. With your new Slide Layout active within the
Slide Master View, access the
Slide Master tab of
the Ribbon. Then click the bottom
half of the Insert Placeholder button, highlighted in red
within Figure 2, below. Thereafter click the Picture option in the resultant
drop-down menu, as shown highlighted in blue within Figure 2, below.
-
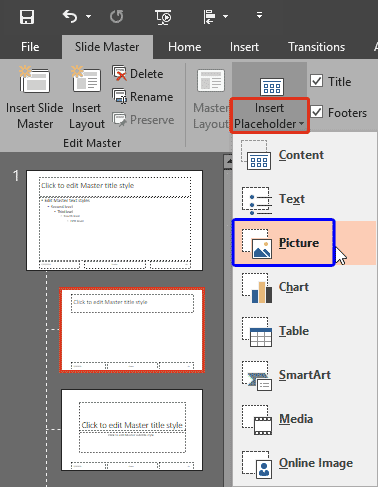
Figure 2: Picture placeholder
- Go ahead and drag and draw to
insert a Picture
placeholder in the new Slide Layout, as shown in Figure 3, below. Resize and reposition
your placeholder as required.
-
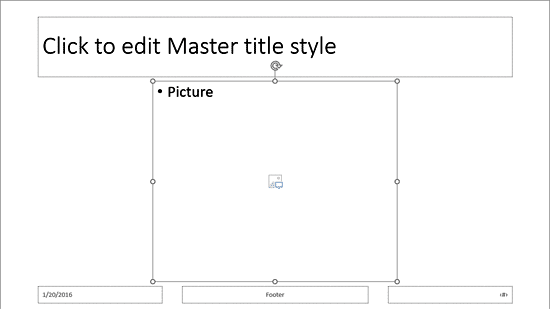
Figure 3: Picture placeholder within the Slide Layout
Tip: Want to resize or reposition your new picture placeholder precisely? Explore our
Shape tutorials that explain how you can do these tasks with
Shapes. Picture placeholders are shapes too! What's important though is that you do nothing more than resizing
and repositioning at this time with your Picture placeholder, since the
Merge Shape options we
explore next won't work if the placeholder is further formatted.
- Access the Home, Insert, or Drawing Tools Format
tab of the Ribbon. You'll find a button called Shapes in any of these tabs.
Click the Shapes button to bring up the Shapes drop-down gallery as shown
in Figure 4.
-
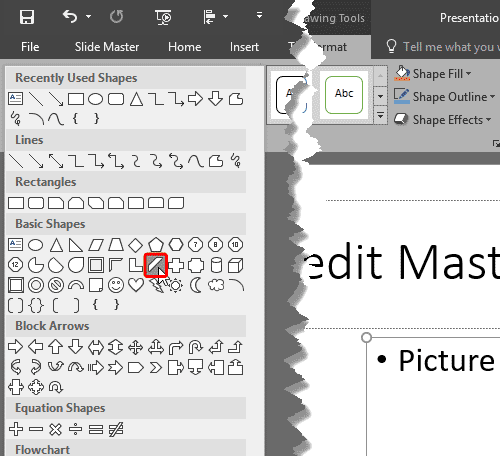
Figure 4: Shapes drop-down gallery
Note: The
Drawing Tools Format tab is a
Contextual tab.
These contextual tabs are special tabs in the
Ribbon that are not visible all
the time. They only make an appearance when you are working with a particular slide object which can be
edited using special options.
- From the Shapes drop-down gallery, choose a shape that goes well as the corner
of your typical rectangular picture placeholder. We choose the Diagonal Stripe
shape (highlighted in red within Figure 4, above). Now
insert the shape within your slide
layout. We placed it on the top left corner of the rectangular picture placeholder, as shown in
Figure 5. We also changed the line attribute of this shape to
No Line.
-
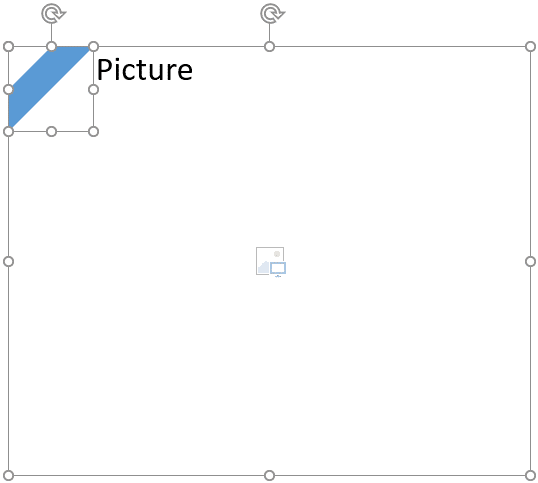
Figure 5: Playing on a picture placeholder's corner
- Why did we set the line attribute of the Diagonal Stripe shape to
No Line? That's because a line may add some extra thickness around the shape area, and may
not allow you to accurately place this shape above the top left corner of your picture placeholder.
- We then duplicated
the Diagonal Strip shape (press Ctrl + D)
thrice, and placed instances on all four corners of the picture placeholder
rotating individual shapes as required, as
shown in Figure 6.
-
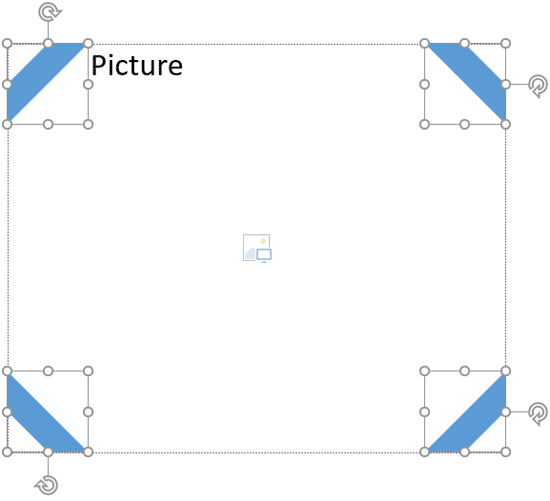
Figure 6: Extra Shapes inserted and rotated
- You now need to combine the four corner shapes with the Picture placeholder. Make sure your picture
Placeholder is selected first. Then select all the inserted corner shapes to add to your selection (press either
the Ctrl or Shift key to add more shapes to your selection).
- Now click the Merge Shapes button within Drawing Tools Format
tab to bring up a drop-down menu, as shown in Figure 7. Within this drop-down menu, select
the Combine option. This results in a custom picture placeholder as shown in
Figure 7.
-
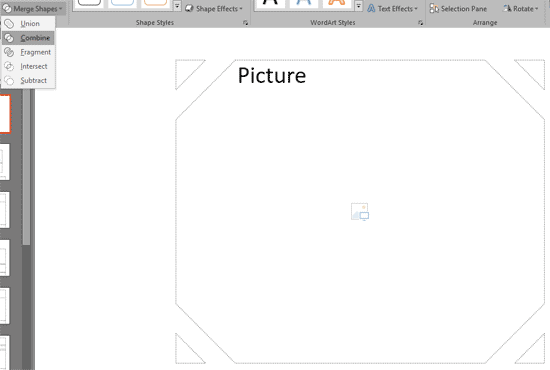
Figure 7: Combine option applied to the selected Picture placeholder and shapes
-
For this tutorial we used the Combine
option. You can even use the Union,
Fragment,
Intersect, and
Subtract options. Results will differ
based on the Merge Tools option you choose and also on the order in which the shapes are selected before they
are combined. Play around with these options.
Note: Not getting the result shown in Figure 7, above? Do you instead see a full
solid color picture placeholder, as shown in Figure 8, below? This may occur depending on whichever
slide object you selected first. If you select any of the corner shapes first, and then the picture placeholder
you'll get the results shown in Figure 8, below. So, always opt for selecting the Picture
placeholder first and then the corner shapes to achieve results shown in Figure 7 above.
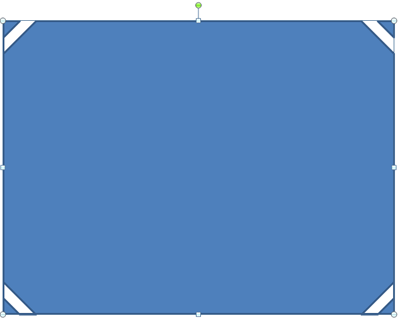
Figure 8: Picture placeholder with solid color
- When done, access the Slide Master tab of the Ribbon, and click
the Close Master View button (highlighted in red within
Figure 9). This will get you back to
Normal View.
-
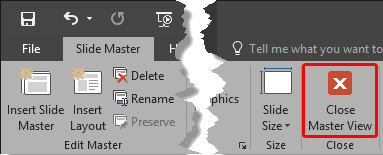
Figure 9: Close Master View button
- Access the Home tab of the Ribbon and click the
Layout button to bring up the Layout drop-down gallery you see in
Figure 10, below. Notice that your new Custom Layout (highlighted
in red within Figure 10) shows up here, ready to be used to create
a new picture slide.
-
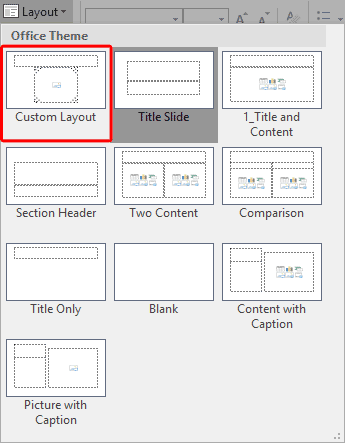
Figure 10: New Slide Layout with the picture placeholder added
Note: The new layouts you create are saved as part of the presentation, and are not available
in any other presentations you create. Other than adding placeholders to your new slide layouts, you can also
change their slide
backgrounds. Of course, you can also
rename your custom
layouts.
- Now add a new slide based on your new layout, as shown in Figure 11, below.
-
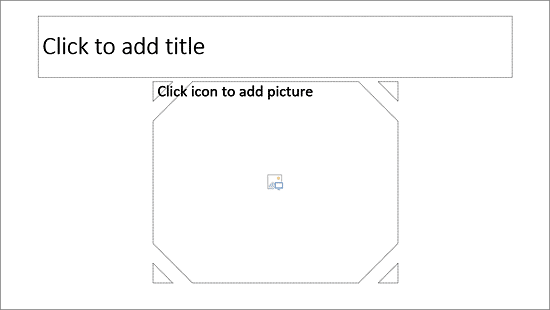
Figure 11: Your new custom Picture placeholder
- Add a picture within the custom Picture placeholder, as shown in Figure 12,
below.
-

Figure 12: Picture placeholder has a picture fill now
- Save your presentation often.


