A picture needs to be "corrected" when its appearance is too dark or too bright. You could end up with pictures that need correction if the lighting was not proper when you clicked the original picture. Additionally, you may also want to make some tonal changes to a picture so that it stands apart. In this tutorial, you will learn how to make corrections to inserted pictures regarding their brightness, sharpness, softness, and contrast values; all from within PowerPoint 2016 for Windows without having to use an external program.
Follow these steps to learn more:
- Open your presentation, navigate to any slide that has a picture inserted. Select or double-click the picture to activate the Picture Tools Format tab of the Ribbon, as shown in Figure 1 (highlighted in red).
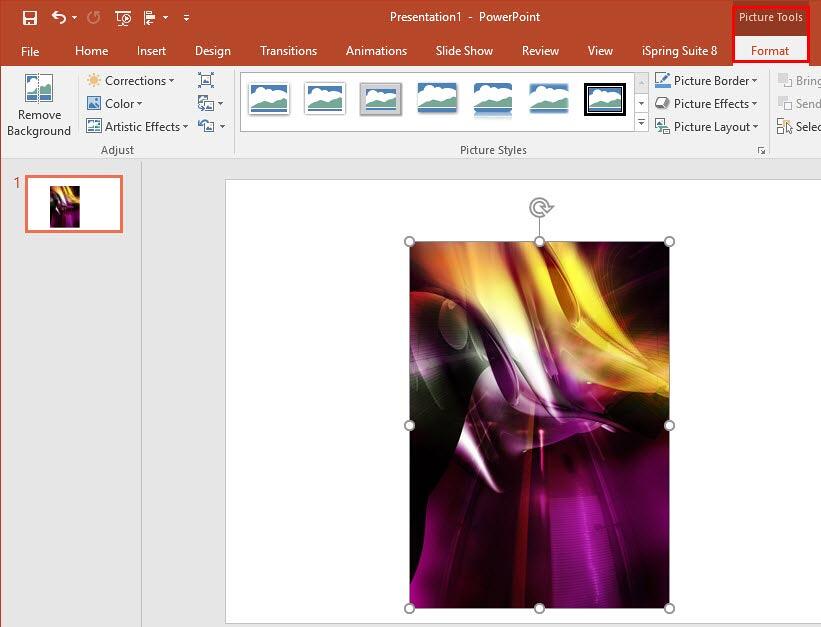
Figure 1: Picture Tools Format tab of the Ribbon Note: The
Picture Tools Format tab is a
Contextual tab. These tabs are special tabs in the
Ribbon that are not visible all the time. They only make an appearance when you are working with a particular slide object which can be edited using special options.
- Within the Picture Tools Format tab, locate the Adjust group. Here you will find several options that let you adjust your pictures. Click the Corrections button (highlighted in red within Figure 2) to access the Corrections drop-down gallery that you can see in Figure 2.
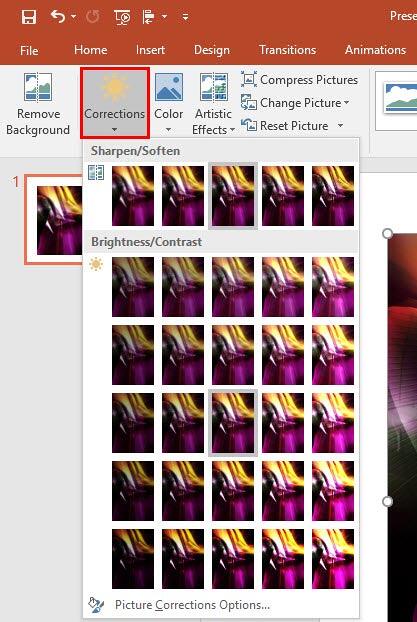
Figure 2: Corrections drop-down gallery - The Corrections drop-down gallery displays preview thumbnails of the selected picture with various Sharpness / Softness and Brightness / Contrast values applied. These previews are placed into two sections:
Sharpen / Soften
- Displays previews with various sharpness and softness values. The thumbnail in the middle (that shows a grey highlight) represents the current status of the picture.
Brightness / Contrast
- Displays previews with various brightness and contrast values. Again, the thumbnail in the middle (that shows a grey highlight) represents the current status of the picture.
- If you hover the mouse cursor over any of the picture variants within the Corrections drop-down gallery as shown highlighted in blue within Figure 3, you will see a tool tip below the cursor (refer to Figure 3 again), which displays the adjustment values of the particular variant. Also, as you move the cursor over different previews, the selected picture shows you a Live Preview of the variation being selected within the Corrections drop-down gallery.
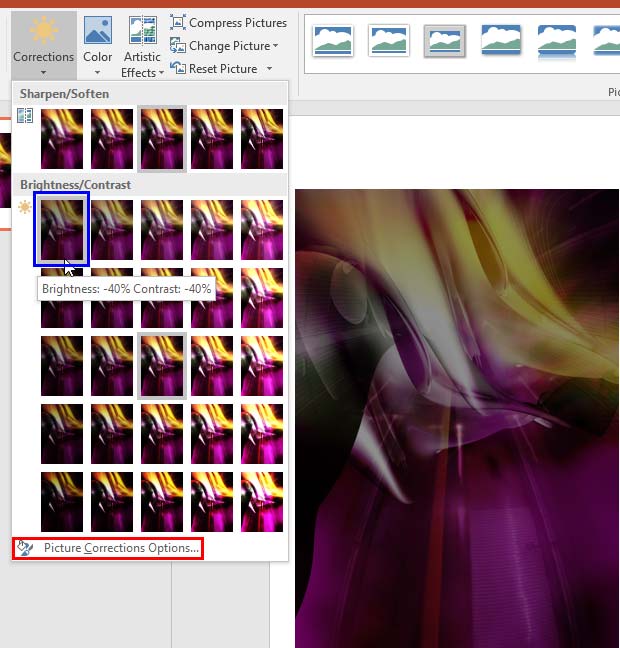
Figure 3: Brightness and Contrast adjustment values displayed in the tool tip - Click on any of the variants to apply its correction values to the selected picture.
- At this point, if you are happy with the effect, then you need not do anything else. Otherwise, if you want to fine-tune the effect further, open the Corrections drop-down gallery once again, and select Picture Corrections Options (highlighted in red within Figure 3 above), to summon the Format Picture Task Pane.
- Within this Task Pane, make sure that the Picture button (highlighted in red within Figure 4) is clicked upon. Then select the Picture Corrections option (highlighted in blue within Figure 4).
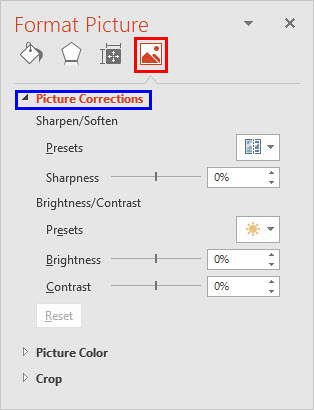
Figure 4: Picture Correction options within the Format Picture Task Pane - Now, make changes to the Brightness, Contrast, Soften, and Sharpness values as required. You can either use the sliders or directly type in the values in digits, as required. All the while, you will see realtime changes happening to your selected picture.
- Once you have fine-tuned the effect using the options within the Format Picture Task Pane, just close the task pane. Figure 5 shows the selected picture with changed brightness and contrast values. Compare Figures 1 and 5 to see the difference.
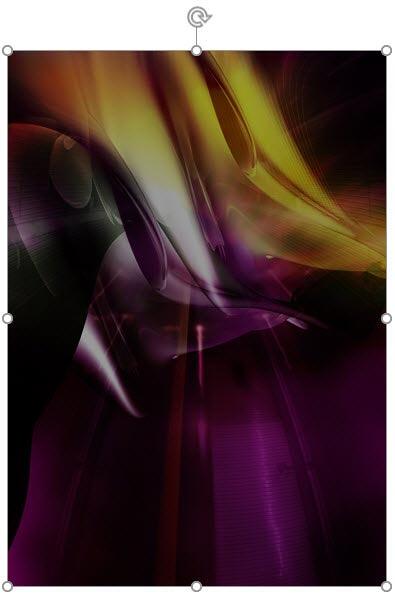
Figure 5: Picture with changed brightness and contrast values - Save your presentation.


