PowerPoint has several features that may amaze you, but there's nothing quite like what we will explore on this page—an option to
convert regular text into a shape. First of all, this is an undocumented feature. And then, this is such an utterly useful option—people
find all sorts of excuses to use this feature. For example, you can now easily create logos in PowerPoint without using any other
application. Or use a fancy font and then share that presentation with others in the knowledge that recipients can see the font exactly as
intended, even if it's not installed on their computers.
Before we begin, you need to know that there are two methods through which you can convert text to shapes in PowerPoint:
- The Intersect method: By converting text to a single shape. Think of each paragraph or multiple paragraphs as a separate shape
- The Fragment method: By converting text into multiple individual shapes. Think of each alphabet as a separate shape
In this tutorial, we will explore the Intersect method. You can explore the other method in our
Convert Text to Shapes by Fragmenting in PowerPoint 2016 tutorial. Follow
these steps to learn how to convert text into editable shapes through intersecting in PowerPoint 2016 for
Windows:
- Insert a new text box on your slide and type in some text.
Change the font type and font size, the
font color, and any
other attributes. Alternatively, select any existing text box on your
slide, as shown in Figure 1, below.
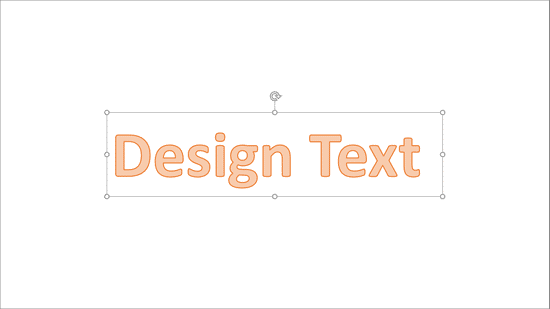
Figure 1: Text box selected on a slide
- Note: This technique only works with text boxes, and not text placeholders. Do not know the difference? Explore our
Text Placeholders vs. Text Boxes in PowerPoint 2016 article.
- If your source text is within a text placeholder, there's an easy solution—select your text placeholder and copy it. Then paste
immediately within the same slide, the pasted copy is now a text box—select this text box, and follow the remaining steps of this tutorial. You might want
to delete your original text placeholder because it might get in the way while selecting the text box, but that's entirely optional.
- Insert a shape (we choose a Rectangle) on your slide. Make sure that it
overlaps your text box in a way that covers it completely, as shown in Figure 2.
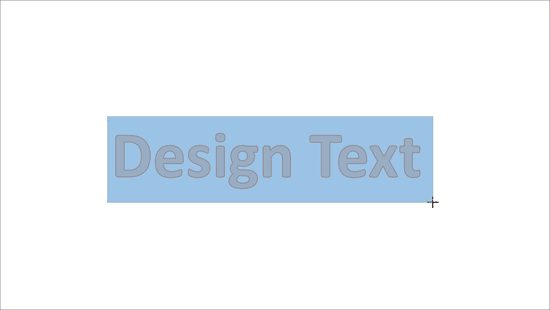
Figure 2: Rectangle shape being drawn over the text box- Once the Rectangle shape is placed, reorder the
Rectangle shape by sending it behind the existing text box, as shown in Figure 3.
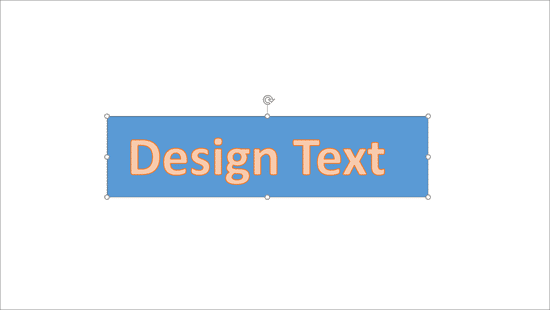
Figure 3: Text Box above Rectangle shape- Now, carefully select the text box and then select the Rectangle shape. It's important that you select the text box first, since the
output shape will take the format of whatever is selected first.
- Once your selections are done, access the Drawing Tools Format contextual tab of the
Ribbon (highlighted in red within Figure 4),
and click the Merge Shapes button (highlighted in blue within Figure 4).
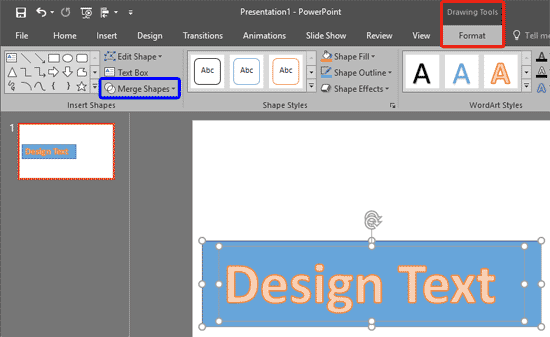
Figure 4: Merge Shapes button- This brings up the Merge Shapes drop-down gallery, as shown in Figure 5. Within the Merge Shapes
drop-down gallery hover the cursor over the Intersect option to see a
Live Preview, as shown in Figure 5. Click the Intersect
option to convert the text into shape.
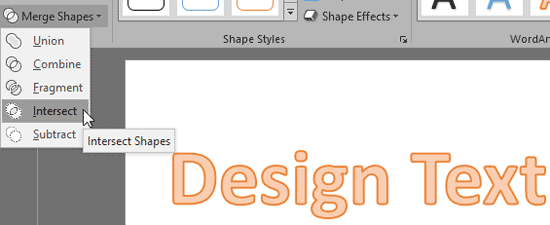
Figure 5: Intersect option to be selected- To make sure that the text is converted to a shape, right-click the converted text and within the context menu that appears, check if you can see the
Edit Points option, as shown in Figure 6.
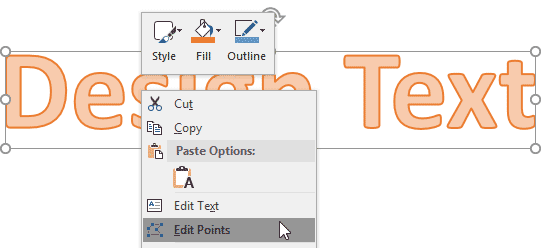
Figure 6: Edit Points option to be selected- If no Edit Points option is available, that means your text has not converted into a shape.
- Click the Edit Points option, and you can see all the points (vertexes) on the converted text, as shown in Figure 7.

Figure 7: Edit Points reassures you that text has indeed been converted to a shape- Make sure you save your presentation often.


