Although using pictures enhances the look of your presentation, it can also phenomenally increase the size of your presentation file. By default, PowerPoint simply copies your inserted pictures into your presentation leaving the size and format largely unchanged.
The Compress feature for pictures offers an image compression utility that reduces the size of all inserted pictures in the presentation in a single step. It does so by reducing the picture resolution to the amount needed for the type of output you specify (Print, Screen, or E-mail). Picture resolution is measured in PowerPoint in pixels per inch, or ppi. This roughly translates to dots per inch (dpi) on a printout. A computer screen shows 96 pixels per inch, so you do not need higher resolution than that if you are only showing your presentation on-screen. However, if you are distributing the presentation in other forms, a higher resolution might be appropriate.
To reduce the resolution and compress images in PowerPoint 2011 for Mac, follow these steps:
- Open the presentation, navigate to the slide that contains a picture and select it. This brings up Format Picture contextual tab on the Ribbon as shown in Figure 1 (highlighted in red).
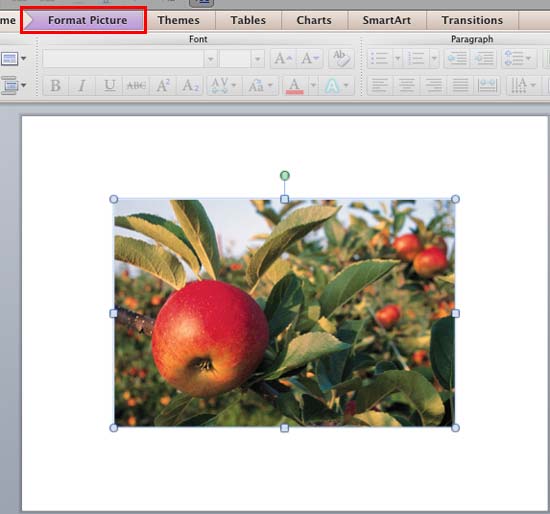
Figure 1: Format Picture tab Note: The
Format Picture tab is a
Contextual tab. Contextual tabs are special tabs in the
Ribbon that are not visible all the time. They make an appearance only when you are working with a particular slide object which can be edited using the options within these tabs.
- Within the Format Picture tab, click the Compress button, as shown highlighted in red within Figure 2.
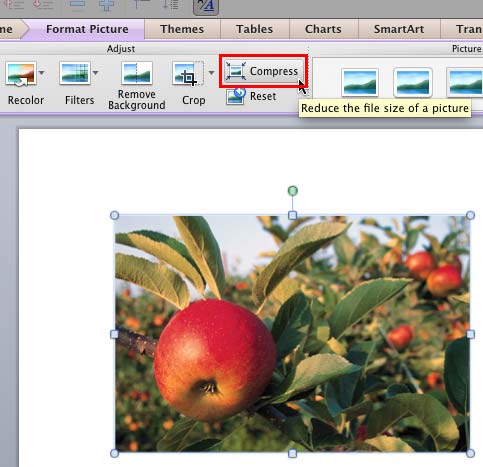
Figure 2: Compress button - Alternatively, select the File | Reduce File Size menu option as shown in Figure 3.
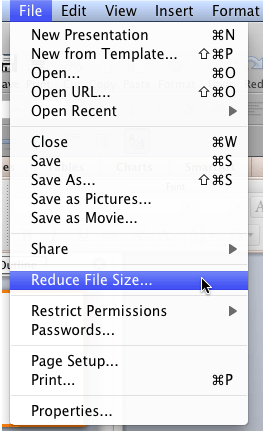
Figure 3: Reduce File Size menu option - Either of the above options brings up the Reduce File Size dialog box, as you can see in
Figure 4.
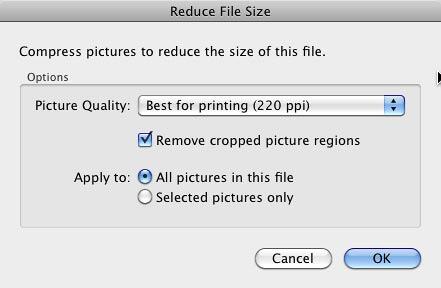
Figure 4: Reduce File Size dialog box Warning: Do note that if you have chosen the File | Reduce File Size menu option without selecting a picture, you will find that both the options within the Apply to section of Reduce File Size dialog box are greyed out. You should select a picture in your presentation before opening the Reduce File Size dialog box to make these options available.
- In this dialog box, click on the Picture Quality selection box to open the Picture Quality drop-down list as shown in Figure 5.
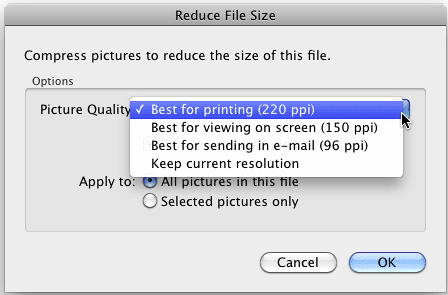
Figure 5: Picture Quality drop-down list - You can decide the quality of the inserted picture choosing between any of the four options available within Picture Quality drop-down list:
Best for printing (220 ppi)
- Select this option if you are printing the presentation on paper; it keeps the photos at a resolution where they will look crisp on a printout.
Best for viewing on screen (150 ppi)
- Choosing this option will enable compression for Screen resolution to display the presentation using a projector or distributing via the Internet. Some projectors have a higher resolution than a monitor.
Best for sending in e-mail (96 ppi)
- Select this option if you are e-mailing the presentation to others, because this lower setting results in a smaller file that will transmit more easily via e-mail.
Keep current resolution (no compression is applied)
- Select this option to keep the default picture resolution. Note that there is no option to set the default picture resolution within PowerPoint 2011 for Mac. However, if a default has been set within the same file using PowerPoint's Windows versions, then this option will respect those defaults.
- Then, if you have cropped the picture, select the Remove cropped picture regions check-box (refer to Figure 4, shown earlier on this page) to remove the unused portions of the picture permanently.
- And finally, you can either compress all the pictures within the presentation, or just the selected picture(s), by selecting between All pictures in this file and Selected pictures only radio buttons (again, refer to Figure 4, shown earlier on this page) within Apply to section.
- Once you are done, click the OK button.
- Make sure you save your presentation.


