OneDrive is a great way to share your presentations online while you are still working on the slides. When you are collaborating on a presentation with someone else, you want to give and receive feedback without actually editing the slides themselves. To do so, you can use the Comments option. This commenting works differently in the web version of PowerPoint compared to the desktop versions. We have already explored how to Add, Edit, or Delete Comments in PowerPoint 2013 for Windows. In this tutorial, we'll learn how to use commenting on PowerPoint presentations saved and edited on OneDrive. Also, it is assumed that the person you are collaborating with is using the same PowerPoint for the Web app on OneDrive.
What is a Comment?
A comment is a note that can be attached to any slide object or to a whole slide. You can edit comments and even receive replies for comments.
Follow these steps to learn commenting on OneDrive in PowerPoint for the Web:
- Open the PPTX or any other PowerPoint file within which you want to add a comment on OneDrive. Then, access the Insert tab of the Ribbon, as shown highlighted in red within Figure 1, below, and click the Comment button, as shown highlighted in blue within Figure 1.
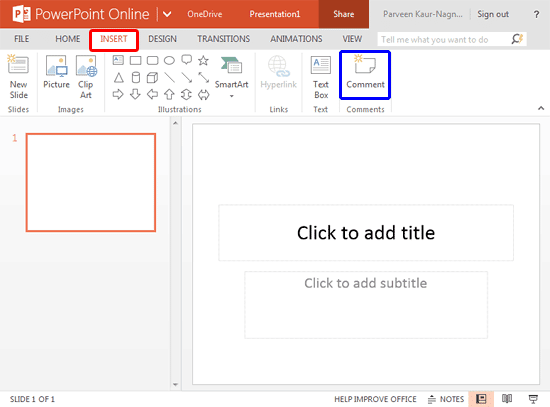
Figure 1: Presentation opened within the PowerPoint Online- Doing so opens the Comments Task Pane, as shown highlighted in red within Figure 2, below.
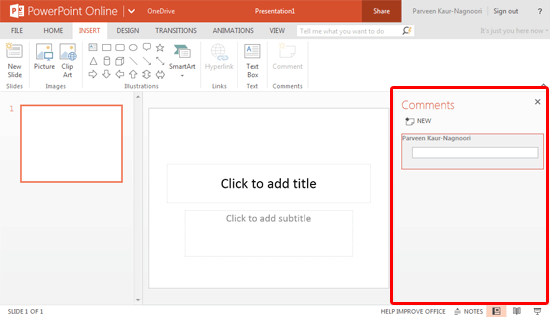
Figure 2: Comments Task Pane- Now, within the Comments Task Pane, just type in your comment within the box, as shown highlighted in red within Figure 3, below. Once done, press Enter or click outside the comment box.
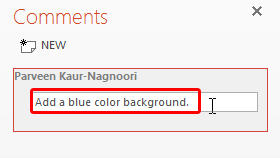
Figure 3: Type in the comments- This adds a comment icon on the slide, as shown highlighted in red within Figure 4, below. Optionally you can easily change the placement of the comment icon by just dragging the icon.
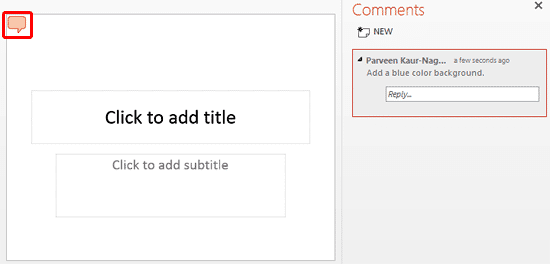
Figure 4: Comment added- Once the comment is added you can wait for the concerned person to reply back to the comment. In Figure 5, below, you can see the comment is replied, as shown highlighted in blue within Figure 5. Also, notice that the Comments icon, as shown highlighted in red within Figure 5, shows one more icon behind the comment icon indicating that the comment was a reply.
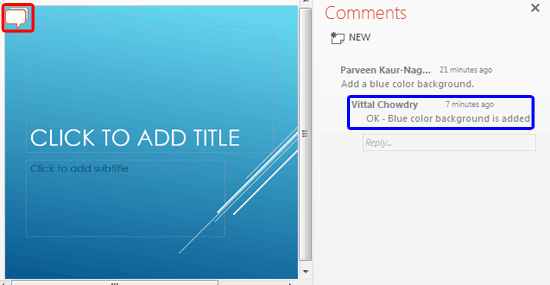
Figure 5: Comment replied- You can continue replying to the original comment and also add new comments, delete comments, etc. within the Comments Task Pane:
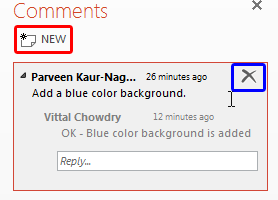
Figure 6: Buttons to add and delete comments- To add a new comment, click the New button, as shown highlighted in red within Figure 6, above. This action adds a new comment box, as shown highlighted in red within Figure 7, below. Type in the comment you want.
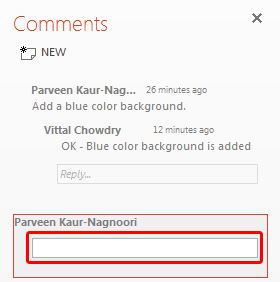
Figure 7: New comment box added- To delete a comment, place your cursor over the comment you want to delete. This brings up the Delete button towards its right, as shown highlighted in blue within Figure 6, previously on this page. Alternatively, select the Comment icon and just click this Delete button to delete the selected comment.
Cannot See Comments?
- Can't see the Comment icon on the slide? Select the View tab of the Ribbon and click the lower half of the Show Comments button. From the resultant drop-down menu, select the Show Markup option, as shown highlighted in red within Figure 8, below. This is a toggle option to hide/show the Comments icon. To hide/show the Comments Task Pane, click the upper half of the Show Comments button or select/deselect the Comments Pane option, as shown highlighted in blue within Figure 8.
- Also note that when both the Comments icon and the Comments Task Pane are visible. Then, if you click the Show Markup option, both the Comments icon and the Comments Task Pane will disappear. Thereafter, clicking the same Show Markup option again will bring back only the Comments icon.
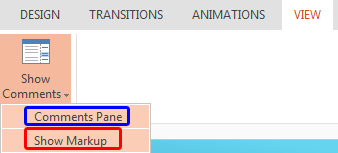
Figure 8: Show Comments button
- Make sure to save your presentation so that all comments are saved.


