Learn how to change one picture into another in PowerPoint 2013 for Windows. All effects and formatting applied to the original picture are retained in the changed picture.
Author: Geetesh Bajaj
Product/Version: PowerPoint 2013 for Windows
OS: Microsoft Windows 7 and higher
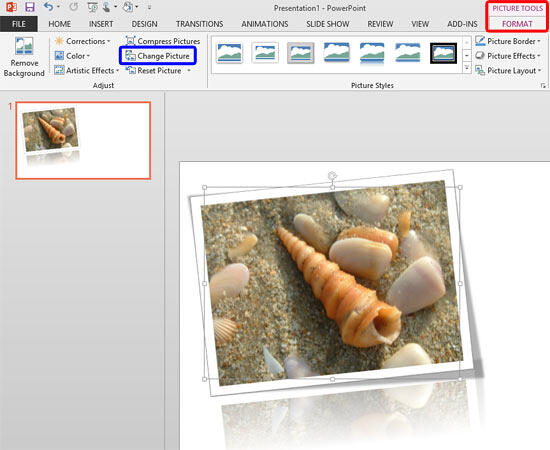
Imagine you have inserted a picture in PowerPoint 2013 for Windows, and then you applied various picture editing options to enhance its appearance. For example, you may have added a border, applied some Picture Effects, etc. to end up with a picture that looks like what you can see in Figure 1. Probably, you then added both Fade and Zoom animations, synced them to happen together, and also timed the animations to occur at a particular speed. You may find yourself often doing these same tasks: adding all sorts of picture edits and animating them.

Figure 1: Picture applied with various enhancing options
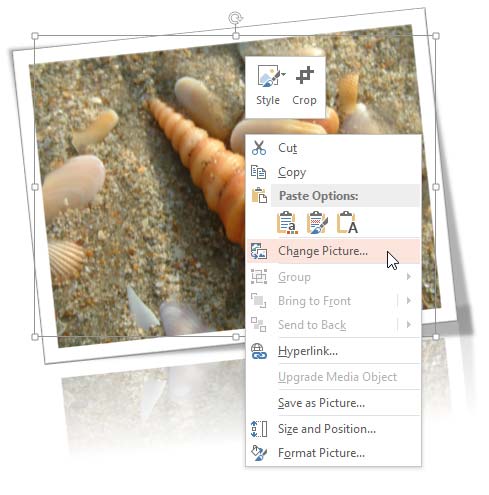
And then you realize that you have a better picture, or your boss asked you to change the existing picture to another one, but with all the same effects and animations! You would probably delete the original picture and start all over again, and yes, that is a long process! Or you can change any existing picture into another with just a couple of clicks, retaining all effects and animations.
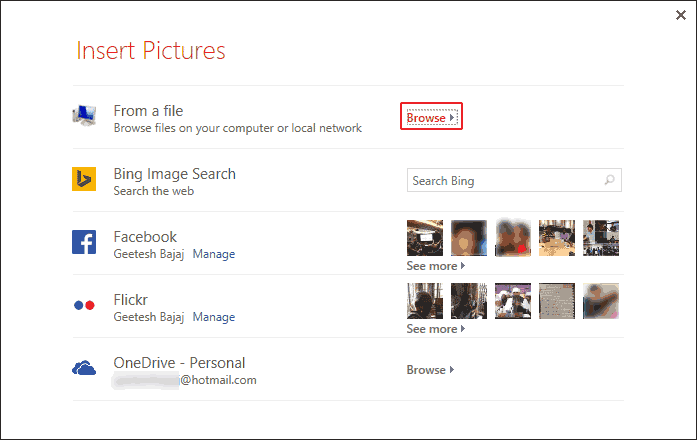
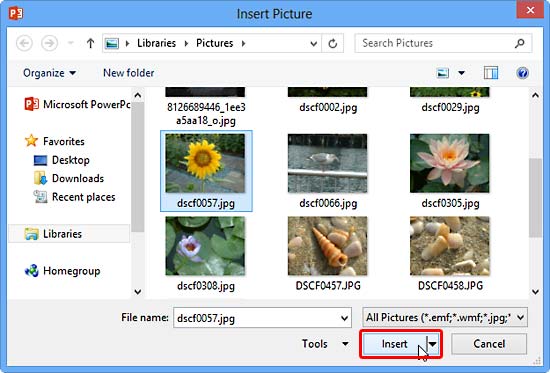
Explore more by following these steps in PowerPoint 2013 for Windows:


See Also:
Pictures Basics and Adjustments: Change Picture (Glossary Page)
Change Picture in PowerPoint Online
Change Picture in PowerPoint 2016 for Windows
Change Picture in PowerPoint 2011 for Mac
Change Picture in PowerPoint 2010 for Windows
You May Also Like: 16 Design Tips for Beautiful Presentations | Palestine Flags and Maps PowerPoint Templates


Microsoft and the Office logo are trademarks or registered trademarks of Microsoft Corporation in the United States and/or other countries.