Once you insert an organization chart (org chart) within PowerPoint, you might need to change the layout of the org chart. Now, layout is a broad term, but in PowerPoint, it means how subordinate levels in the hierarchy branch out from top to bottom. Probably, you want all subordinates flushed to the left, hanging to the right, or distributed evenly across a horizontal plane?
Follow these steps to change layouts for org charts work in PowerPoint 2013 for Windows:
- Select the top-most shape in your existing org chart, as shown in Figure 1, below. As you may notice, selecting any or all parts of the org chart activates two contextual tabs on the Ribbon. These are the SmartArt Tools Design and the SmartArt Tools Format tabs, as shown highlighted in red within Figure 1. Select the SmartArt Tools Design tab.
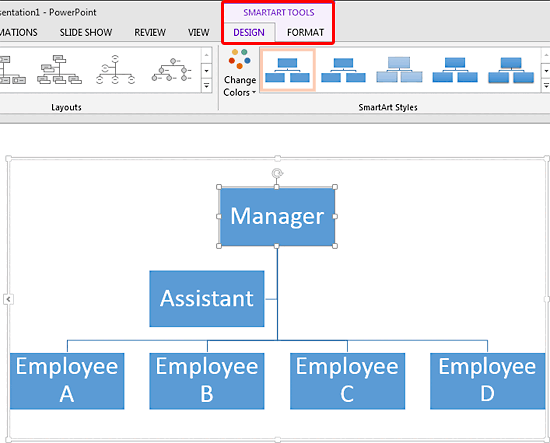
Figure 1: SmartArt Tools Design tab Contextual Tabs
- The SmartArt Tools Design and the SmartArt Tools Format tabs are contextual tabs. These tabs are special tabs in the Ribbon that are not visible all the time. They only make an appearance when you are working with a particular slide object which can be edited using special options.
- Within the SmartArt Tools Design tab, click the Layout button, as shown highlighted in red within Figure 2, below.

Figure 2: Layout button - Doing so brings up the Layout drop-down gallery, as shown in Figure 3, below.
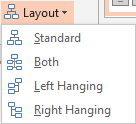
Figure 3: Layout drop-down gallery - Options within the Layout drop-down gallery are explained below:
Standard
- This option centers all shapes below the selected shape in a horizontal plane as shown in Figure 1, previously on this page.
Both
- This option centers the selected shape above the subordinate shapes beneath, and arranges those shapes into two columns, as shown in Figure 4, below.
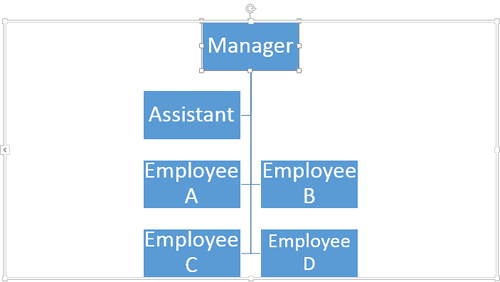
Figure 4: Org chart with Both layout applied Left Hanging
- Positions subordinate shapes flushed (hanging) beneath the selected shape, towards the left, as shown in Figure 5, below.
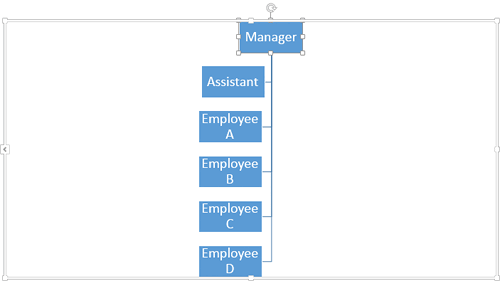
Figure 5: Org chart with Left Hanging layout applied Right Hanging
- Positions subordinate shapes flushed (hanging) beneath the selected shape, towards the right, as shown in Figure 6, below.
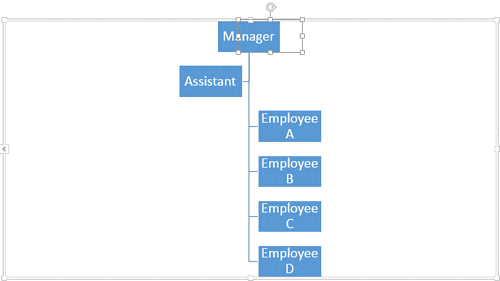
Figure 6: Org chart with Right Hanging layout applied - You can switch between the sequencing of shapes by clicking the Right to Left button (next to the Layout button, as shown highlighted in blue within Figure 2, shown previously on this page).
- Figure 7, below, shows how the position of other shapes has changed. Compare the variant on the top with the variant on the bottom.
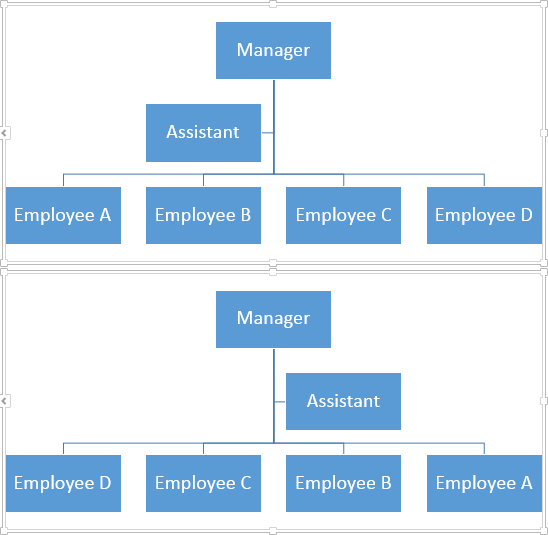
Figure 7: Shape positions change their sequence - Save your presentation often.


