Although default colors within a SmartArt graphic may work great, you may want to explore changing colors of individual shapes contained inside the SmartArt graphic. While it is possible to change colors of individual shapes within the SmartArt graphic, this can be time-consuming. Instead, you can explore a cool feature wherein PowerPoint lets you change colors of everything within the SmartArt graphic at one go.
Follow these steps to change colors of your SmartArt graphic in PowerPoint 2016 for Windows:
- Select your existing SmartArt graphic, as shown in Figure 1, below. The SmartArt graphic variant used here is the Horizontal Picture List. This variant is perfect for this tutorial since it comprises shapes with solid fills, shapes with picture fills, as well as text. You'll notice how each element is colored differently.

Figure 1: Horizontal Picture List SmartArt graphic - When any SmartArt graphic is selected, you'll find two contextual tabs activated on the Ribbon. These are SmartArt Tools Design and SmartArt Tools Format tabs, as shown highlighted in blue within Figure 2, below. Activate the SmartArt Tools Design tab by clicking on it.
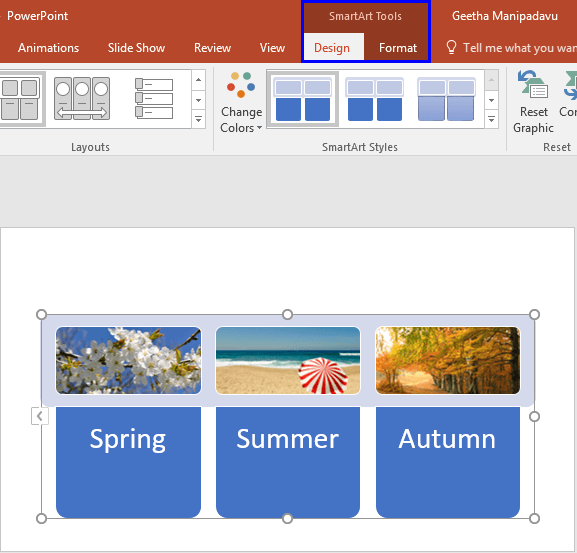
Figure 2: SmartArt Tools Design tab selected Contextual Tabs
- The SmartArt Tool Design and SmartArt Tool Format tabs are contextual tabs. These tabs are special tabs in the Ribbon that are not visible all the time. They only make an appearance when you are working with a particular slide object which can be edited using special options.
- Within the SmartArt Tools Design tab, click the Change Colors button, as shown highlighted in red within Figure 3, below.

Figure 3: Change Colors button - Doing so brings up the Change Colors drop-down gallery, as shown in Figure 4, below. All color variations within this gallery are Theme-based.
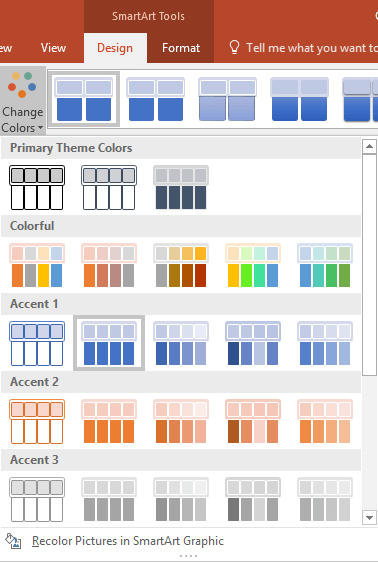
Figure 4: Change Colors drop-down gallery - Hover the cursor over any of the color previews in this gallery. As you hover over different previews, the selected SmartArt graphic on the slide shows a live preview of the colors applied, as shown in Figure 5, below. Click on the preview thumbnail you like within the gallery to apply color changes to the selected SmartArt graphic.
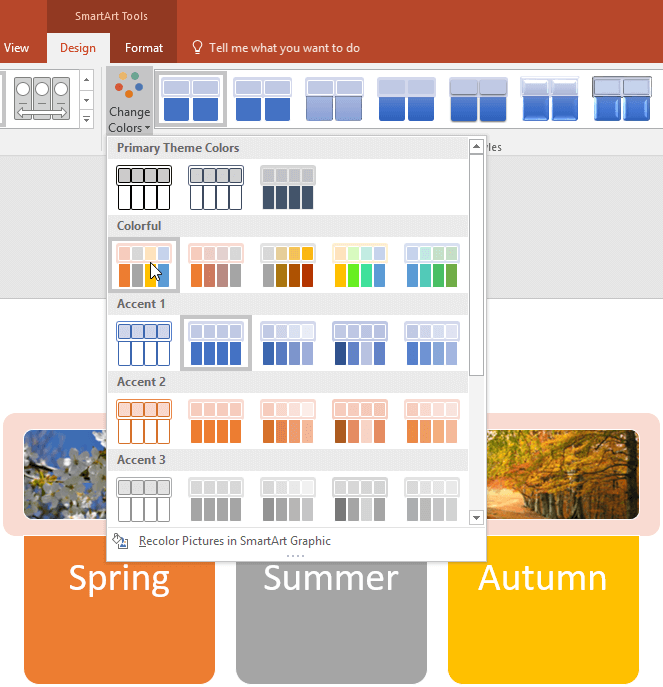
Figure 5: SmartArt graphic showing live preview of the color selected Don't Cover the Preview Area
- Place your SmartArt graphic in an area that is not covered by the Change Color drop-down gallery, so you can see the Live Preview.
- Figure 6, below shows the selected SmartArt graphic with changed colors (compare with Figure 1, shown previously on this page). Notice that the color of picture fills is not changed because they were originally not recolored, but we can also recolor them, as explained hereafter.
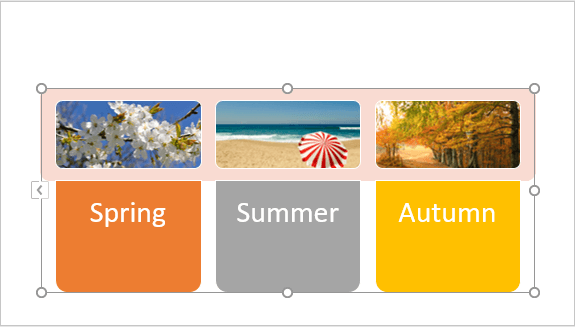
Figure 6: Color changed for selected SmartArt graphic - To change the color of picture fills, first make sure that the SmartArt graphic is selected. Then, summon the Change Colors drop-down gallery. Within this drop-down gallery, select the Recolor Pictures in SmartArt Graphic option, as shown highlighted in red within Figure 7, below, to recolor all picture fills within the SmartArt graphic.
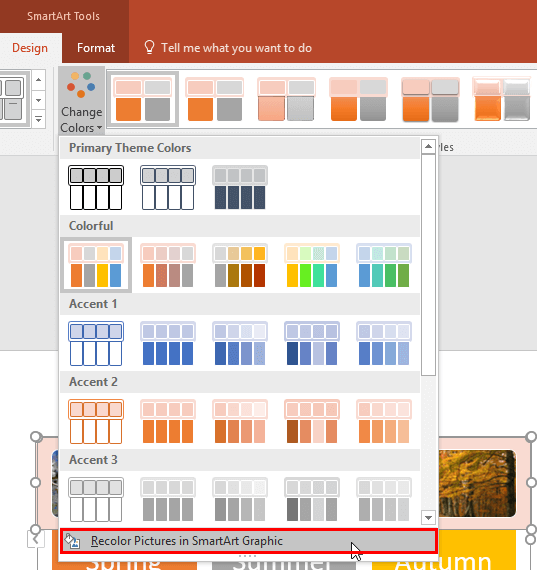
Figure 7: Recolor Pictures in SmartArt Graphic option - This action changes the color of pictures, as shown in Figure 8, below (compare with Figure 6, shown previously on this page). The Recolor Pictures in SmartArt Graphic option will only work with SmartArt graphic layouts that contain pictures.
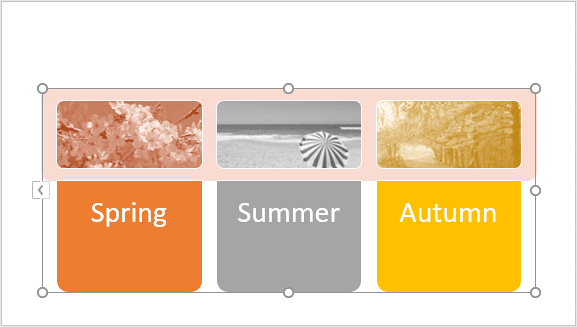
Figure 8: Color of the SmartArt graphic pictures changed
Reset Colors of Pictures in SmartArt Graphics
The Recolor Pictures in SmartArt Graphic option is a toggle. Click it once to recolor and click it again to reset back to the original colors.


