Adding a new Slide Master to your presentation is easy --
and an even easier way is to possibly
duplicate an existing Slide Master.
You can then format it to change its look by applying a
Background Style or by adding a
custom background. You can also add
new Slide Layouts, etc. But why would you do all these tasks in
the first place? There needs to be a compelling reason to do so. This reason leads us to the next logical step -- that is to apply the new
Slide Master you created to selected slides within your presentation.
Follow these steps to learn how to apply Slide Masters to individual slides in
PowerPoint 2013:
- Launch PowerPoint and open your presentation which has multiple Slide Masters. To find out whether your presentation has multiple masters,
access the Home tab of the Ribbon, and click the
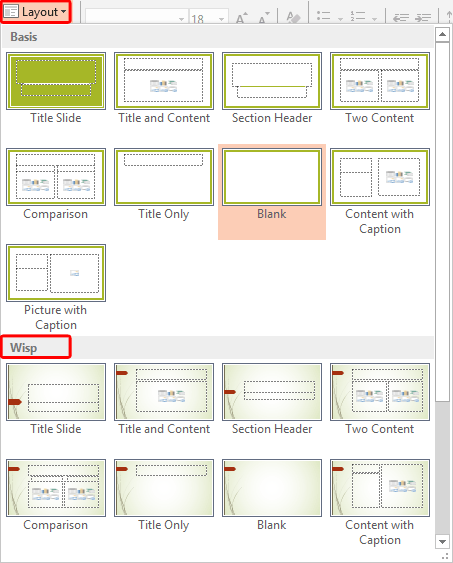
Layout button -- this brings up the Layout drop-down gallery you see in Figure 1, below.
Notice that now there are two Slide Masters within the Layout drop-down gallery (names of both the Slide
Masters are highlighted in red within Figure 1, below).

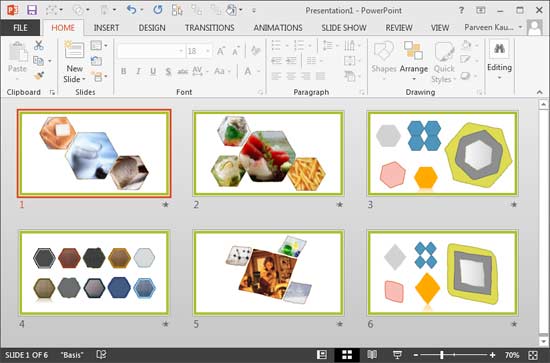
Figure 1: Layout drop-down gallery- If you made no changes, all slides in your presentation will be based on one of the Slide Masters -- typically, the first one, as
you can see in Figure 2, below. To apply another Slide Master to one or more slides, first access the
Slide Sorter view (see Figure 2 again).

Figure 2: Slides within Slide Sorter view
- Now, select the slide(s) to which you want to apply the alternate Slide Master. Figure 2 above
shows the first slide selected.
Tip: To select multiple slides, hold down the Ctrl key and click each slide that you want to select.
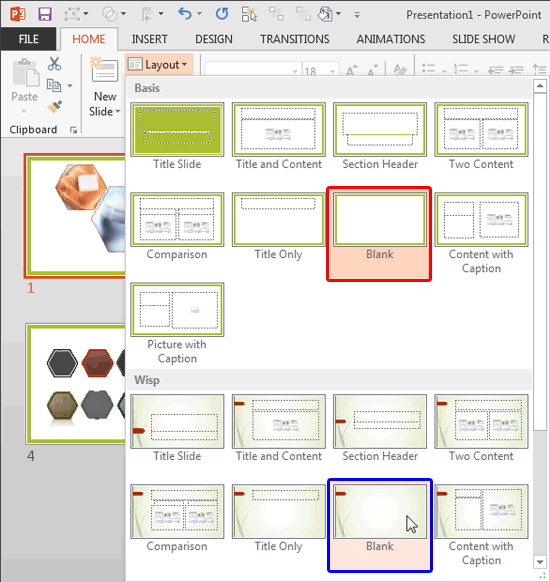
- Next, access the Home tab of the Ribbon, and click the Layout button -- to
bring up a drop-down gallery, as shown in Figure 3.

Figure 3: Layout drop-down gallery
- Note that the selected slide has a specific layout applied -- the Layout gallery shows that the
Blank layout (highlighted in red within Figure 3, above) is active. So while
changing to other Slide Master, make sure you select the same corresponding Blank layout (highlighted in
blue within Figure 3, above).
Warning: This can be a huge concern if you are selecting multiple slides at one go -- all
these slides may have different layouts applied. So be careful during this step to ensure that you don't
inadvertently change layouts while applying a new Slide Master.
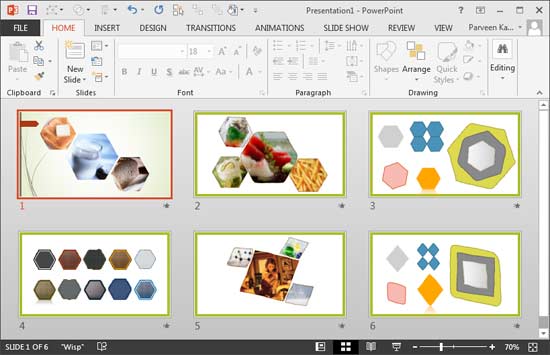
- Select the appropriate layout, Figure 4 shows the selected slide with the changed
Slide Master.

Figure 5: Slide Master changed for the selected slide
- In the same way, change the Slide Master for any other slides.
- When done, get back to
Normal View.
- Save your presentation often.


