Animation in PowerPoint can work in many ways, depending upon what you are animating. That's because PowerPoint has extra options up its sleeve for animating different types of slide objects such as text, charts, or even SmartArt. Once you add animation to your SmartArt, you'll discover that the entire graphic animates at the same time. It may seem that you have no control over animating individual SmartArt shapes, but that's not entirely true since PowerPoint 2011 for Mac does provide some control over animating SmartArt shapes in sequence. In this tutorial, you'll learn where to find those options, and how to use them to animate a SmartArt graphic with more control.
Follow these steps to animate SmartArt graphics in PowerPoint 2011 for Mac:
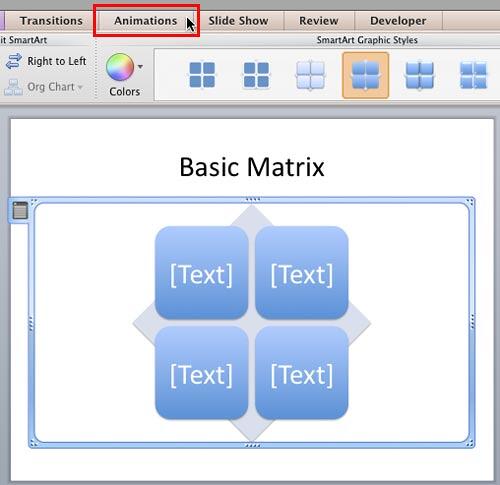
- Select your existing SmartArt graphic. Our sample slide, as shown in Figure 1, below, has the basic matrix SmartArt layout. Then, click the Animations tab, as shown highlighted in red within Figure 1 of the Ribbon.

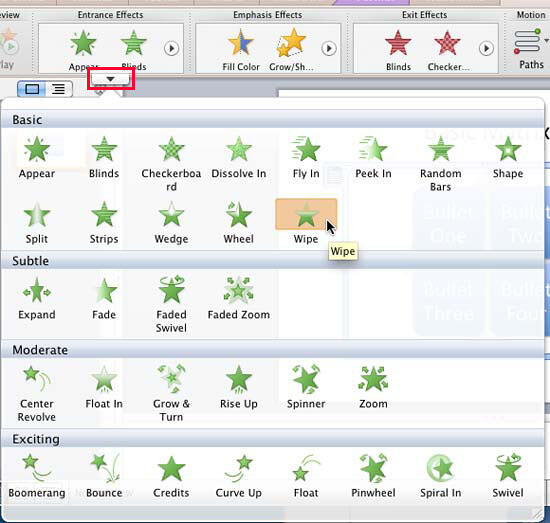
Figure 1: Basic Matrix SmartArt graphic - Doing so will reveal options within the Animations tab, as shown in Figure 2, below. Locate the Entrance Effects group and hover your cursor over the Entrance Effects preview thumbnails to see a down-arrow, as shown highlighted in red within Figure 2. Click this arrow to open the Entrance Effects gallery in drop-down mode, as shown in Figure 2.

Figure 2: Entrance Effects drop-down gallery PowerPoint Animation Types
- PowerPoint provides four animation types. To know more about animations, check the Types of Animation tutorial.
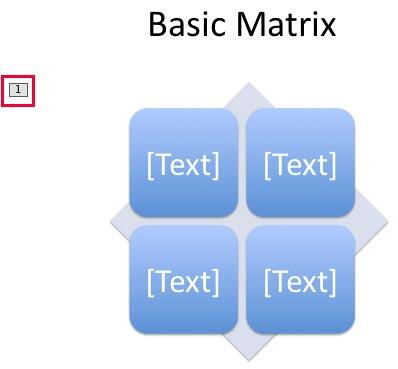
- In the Entrance Effects drop-down gallery, click on any of the Entrance Effect animations to apply it to your SmartArt. For this example, we used the Wipe animation, as shown in Figure 2, above. Note that this adds the digit 1, as shown highlighted in red within Figure 3, below, to the SmartArt graphic, indicating that an animation has been applied. And since you see only "1" without any "2", "3", etc. you can assume that there is no sequenced animation, and the entire SmartArt graphic is going to be animated all at once.

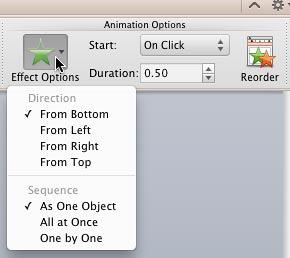
Figure 3: Wipe entrance animation applied to SmartArt graphic - Once you have applied an animation, you may want more control over the sequencing of the animation for different shapes contained within your SmartArt. Options to control the sequencing can be found within the Animation Options group, as shown in Figure 4, below, within the Animations tab of the Ribbon.

Figure 4: Options to edit sequencing of the animation - As soon as animation is applied, the Effect Options button located within Animation Options group is no longer grayed. Click the button to summon the Effect Options drop-down list, as shown in Figure 4, above.
Effect Options
- Within the Effect Options drop-down gallery, you can choose from the four directions available for the Wipe animation. Note that unlike the Wipe animation, other animations may not have a Direction option. What's significant though is that the Sequence options, which are explained below will be similar for all types of animated SmartArt graphics.
- Additionally, you can choose the Sequence of the animation, as explained below:
As One Object
- Animates the entire SmartArt graphic at one go.
All at Once
- Animates all SmartArt shapes at one go.
One by One
- Animates SmartArt shapes one by one.
- Once you are done with applying and editing animation, you can preview the animation by clicking the Play button within the Preview group of Animations tab, as shown in Figure 5, below.

Figure 5: Play button used to preview the animation - Save your presentation.
Custom Animation within the Toolbox
You can control the animation further using the options within the Custom Animation tab of the Toolbox. To access this toolbox, click the Show or Hide the Toolbox icon in the Standard Toolbar, as shown in Figure 6, below. More information on using the options within this tab can be found in our Custom Animation Tab of Toolbox in PowerPoint 2011 tutorial.

Figure 6: Toolbox icon 


