Animating table components is something that you cannot do in PowerPoint. You can either animate the entire table at one time or you decide not to animate at all. You can however ungroup the table using the workaround explained in our Ungroup a Table in PowerPoint 2013 for Windows tutorial and then animate the ungrouped components as required. When you ungroup a table the output will be a bunch of rectangles and text boxes, as shown in Figure 1, below. This looks like a table but is no longer a table.
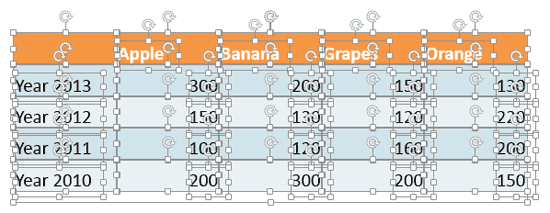
Figure 1: Table components converted into individual shapes
These table components are not bound to each other, so you can make them animate in any manner as you wish—row by row, or column by column, or in any other way you want. However, you should be cautious enough to ensure that the animation is relevant to the data that the table represents. In this tutorial we will show you how to animate this ungrouped table row by row.
Follow these steps to learn more in PowerPoint 2013 for Windows:
- Duplicate the slide containing the ungrouped table so that you have saved a backup slide, in case something goes wrong. Now ungroup the table.
- Deselect the table components by clicking outside the ungrouped table. Then, click beneath the table in the area where a horizontal line was visible when table components were selected, as you can see in Figure 1, above. Doing so will select the box that contains the table components, as shown in Figure 2, below. Delete this box.
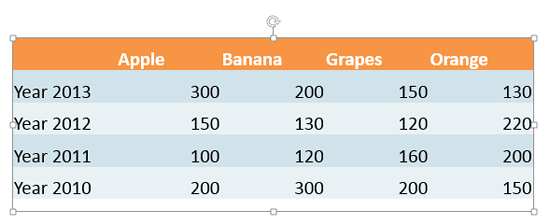
Figure 2: Box containing the table components selected - Now, you are left with individual table cells and text boxes, as shown in Figure 3, below.

Figure 3: Table cells and text boxes - Since we are animating the table row by row, let us group the components that make up a single table row. Start with selecting components within the first row for grouping. Drag and draw a marquee over the first row—make sure to cover a little extra area around the row, as shown in Figure 4—but still not so much extra so that you end up selecting components within adjacent rows!
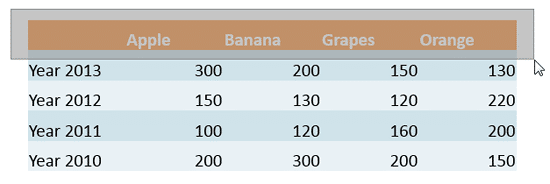
Figure 4: Marquee drawn over the first row - As soon as you release the mouse button, you will see that all table components within the first row are selected, as shown in Figure 5.
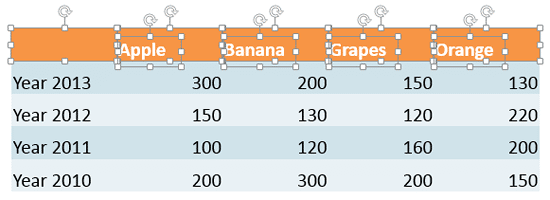
Figure 5: First row of table components selected - Now, group all selected table components within the first row, as shown in Figure 6, below. Use the Ctrl + G keyboard shortcut to group.
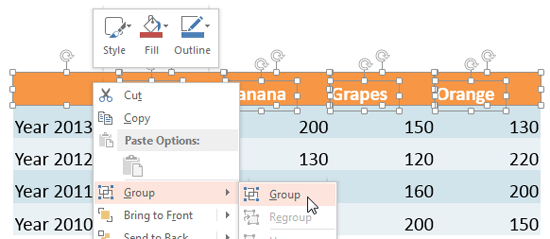
Figure 6: Table components within the first row being grouped - Similarly, group components within other rows of the table.
- After grouping to create individual rows, it's time to animate them. Start with applying an animation to the first table row. In Figure 7 below, you can see that we have selected Wipe, which is one of the Entrance Animations that PowerPoint provides.
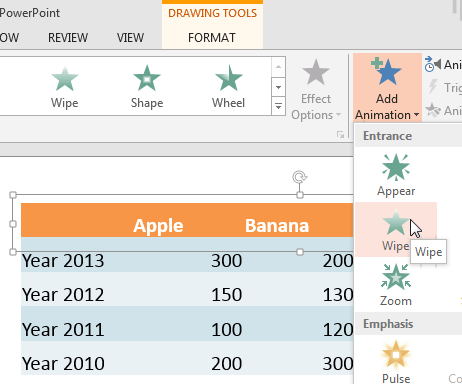
Figure 7: Wipe animation being applied to the first table row - After applying the animation, access the Effect Options button within the Animations tab of the Ribbon to bring up a drop-down gallery with options for the selected animation type. In Figure 8 below, you can see that we set our Wipe animations to play From Left.
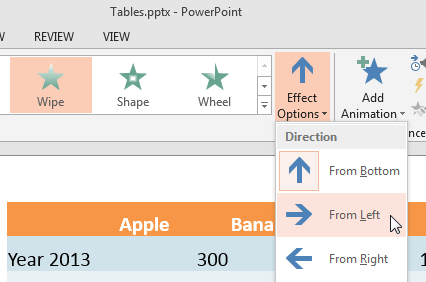
Figure 8: Wipe animation set to play From Left - Then, set the animation event and speed as required. In Figure 9 below, you can see the animation event set to After Previous, as shown highlighted in red, and Duration (speed) set to 1.50 seconds, as shown highlighted in blue.
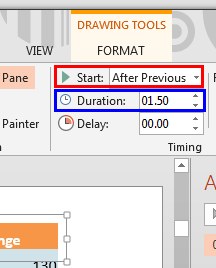
Figure 9: Animation event and speed set for the table row - You can also try some other options to make the animation more effective. To learn more about various animation options, explore our Animation and Transitions page. Figure 10 below, shows the first row of our sample table after being applied with animation.

Figure 10: First table row animated - Test your animation to ensure that you end up with what you needed. Similarly, select other grouped table rows and add animation as required.
- Save your presentation often.


