Introduction
AKVIS ArtWork 9 is an Adobe Photoshop compatible plug-in and also a standalone application that provides seven painting styles (Oil Painting, Watercolor, Gouache, Comics, Pen & Ink, Linocut, Pastel) for your photos. With these painting styles, you can convert your photograph into a piece of art. It also offers a wide choice of canvases and text options. AKVIS ArtWork 9 is an upgraded version of AKVIS ArtWork 7 which brings new decoration effects and frames, improved innovative interface, adds support for ultra HD resolution screens, and other significant changes.
AKVIS ArtWork is from AKVIS, a company based in Russia that specializes in graphic programs. Apart from ArtWork, AKVIS also creates other Photoshop plug-ins like Pastel, OilPoint, AirBrush, Sketch, Neon, Refocus, Retoucher, Chameleon, MultiBrush, Enhancer, Decorator, Coloriage, etc.
You can download a free 10 days trial version of ArtWork 9 from the AKVIS site.
My contact at AKVIS for this review was Lidiya Azanova. Thank you, Lidiya.
Back
How To Use
Once ArtWork 9 is installed, follow these steps, or just read along to do a quick walkthrough of ArtWork 9.
- Launch an image editor such as Adobe Photoshop (where you installed the ArtWork 9 plug-in) and open any picture.
- Choose Filter | AKVIS | ArtWork, as shown in Figure 1.

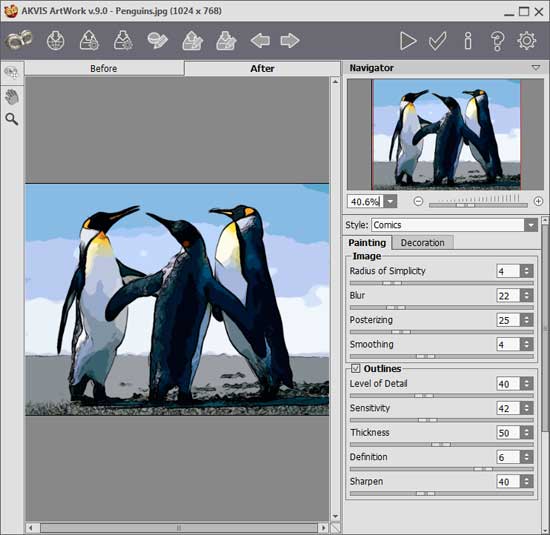
Figure 1: ArtWork plug-in within the Filter menu - This opens the image within the AKVIS ArtWork 9 interface, as you can see in Figure 2.

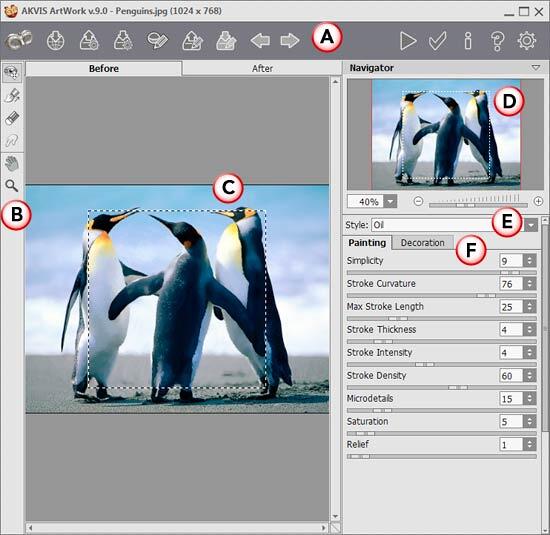
Figure 2: AKVIS ArtWork 9 interface - The AKVIS ArtWork 9 interface is explained below. Each description corresponds to an area marked in Figure 2, above:
A. Buttons
- This section provides options to undo/redo, share, import/export presets, start processing the image, and to apply the results to the image. There are also buttons to launch the information dialog, help files, open the AKVIS ArtWork web page, and the Preferences dialog box.
B. Tools
- Here you can access the following selection tools:
- Preview Window tool enables you to show/hide the preview window. This is the same preview that you can see within the After window (see point C). Only in this case you see the After Preview in a square frame outlined with a dotted line (marching ants). The size of this frame is 500x500 pixels and can be changed within the Preferences dialog box.
- Stroke Direction is for drawing guiding lines (in Oil and Pastel styles). Note that this tool only works in Home Deluxe/Business licenses of ArtWork, and an explanation of these licenses can be found on the AKVIS site.
- Eraser is used to erase the guiding lines, either partially or completely.
- Smudge Tool is a post-processing tool (works within the After tab, under Home Deluxe/Business licenses only). Select this tool to manually refine images by removing paint irregularities (in Oil, Watercolor, Gouache and Pastel styles).
- Select Blur Tool (works only for Watercolor and Gouache styles) to reduces image sharpness by decreasing color contrast.
- Hand to pan the picture within the preview section, especially if it’s zoomed.
- Zoom is used to zoom in the picture. You can also press the Alt key along with the same option to zoom out.
C. Preview
- Preview has two tabs: Before and After, to show the previews of both the original and changed images.
D. Navigator
- On the top right, you'll find the Navigator. This also lets you choose the area of the image to be shown in the Preview pane.
E. Style
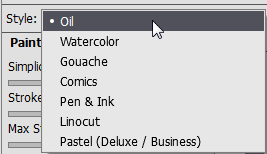
- Click this selection box to bring up a drop-down list, as shown in Figure 3 below. Here, you'll find all the seven painting styles, and you can choose from any of them.

Figure 3: Style drop-down list F. Settings Panel
- Settings Panel has two tabs: Painting and Decoration
- Within the Painting tab you can adjust the settings for photo-to-paint conversion (refer to Figure 2, above).
- The Decoration tab has three sub-tabs: Text, Canvas, and Frame
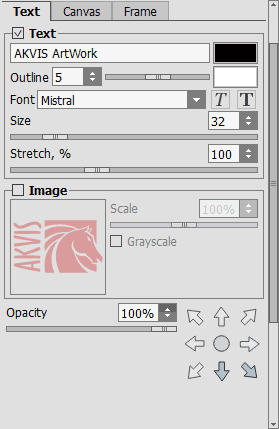
- Text tab (see Figure 4, below) allows you to add an inscription to your painting.

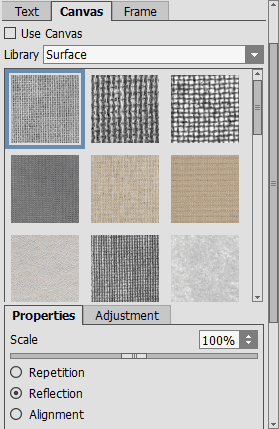
Figure 4: Text tab - In the Canvas tab (see Figure 5, below) you can adjust the settings for the canvas, to which the resulting image is applied.

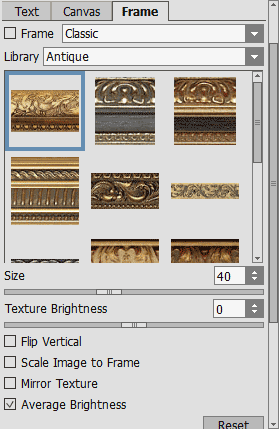
Figure 5: Canvas tab - In the Frame tab (see Figure 6, below) you add a frame to your artwork.

Figure 6: Frame tab - There's also Presets field which enables you to save the current settings as a preset to use them in the future. Each Style includes a number of ready-to-use presets.
- Play with the parameters, or choose from any of the available presets. When you get the results you want, apply the changes to the preview by clicking the Run button that you can see below.

- This applies the effect and creates a preview of the changed image in the After tab, as shown in Figure 7.

Figure 7: Preview the changes - Once you’re happy with the preview, apply the result to the image by clicking the Apply button, shown below to return to the image editor.

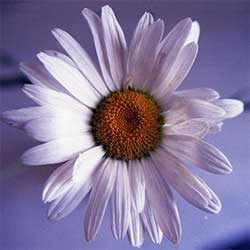
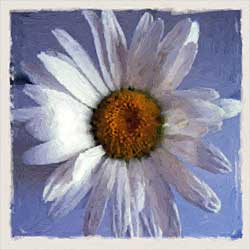
Here are some Before and After samples created using AKVIS ArtWork 9:


Back
Specifications
| Photoshop Versions: |
Photoshop CS-CS6, CC, CC 2014, СС 2015, Elements v.1-14, etc. More information can be found on the
AKVIS Compatibility page. |
| Platforms: |
Windows, Mac |
| Site: |
AKVIS |
| Price: |
USD $72 and above |
| Trial Version: |
Available
|
Back
