After inserting a video clip into PowerPoint, you can play the clip with minute control over its volume, looping, rewinding, etc. Rather than create smaller tutorials that explore these options, we are exploring them all on this page. Before we do so, it's important to understand that these abilities only exist so that you can use them when they are required, rather than using them just because they exist!
Follow these steps to explore advanced options for video clips in PowerPoint 2013 for Winodws:
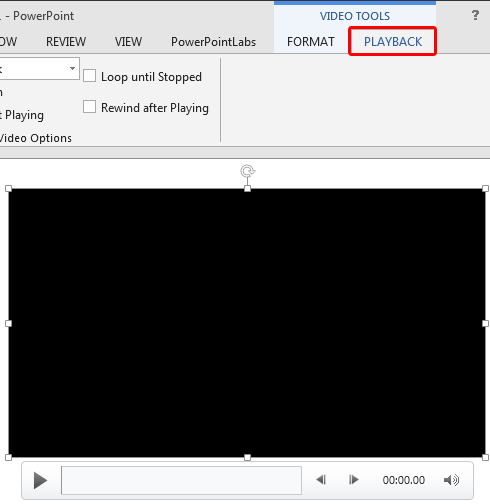
- Open your presentation, and navigate to the required slide where you have already inserted a video clip. Select or double-click the video clip to bring up the two contextual Video Tools tabs in the Ribbon. These two tabs are Format and Playback. Click the Playback tab to activate it, as shown highlighted in red within Figure 1, below.

Figure 1: Video Tools Playback tab of the Ribbon
Contextual Tab
- The Video Tools Playback tab is a Contextual tab. Contextual tabs are special tabs in the Ribbon that are not visible all the time. They only make an appearance when you are working with a particular slide object which can be edited using special options.
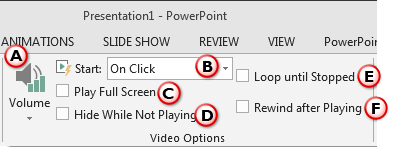
- Within the Video Tools Playback tab, locate the Video Options group, as shown in Figure 2, below.

Figure 2: Video Options within Video Tools Playback tab of the Ribbon - Within the Video Options group you'll find all the advanced video options which are explained below, as marked in Figure 2, above:
A.Volume
- This button enables you to set the volume for your video clip. Click the down-arrow of the Volume buttonto bring a drop-down menu, as shown in Figure 3. Within the Volume drop-down menu, choose one of the following options: Low, Medium, High, and Mute.

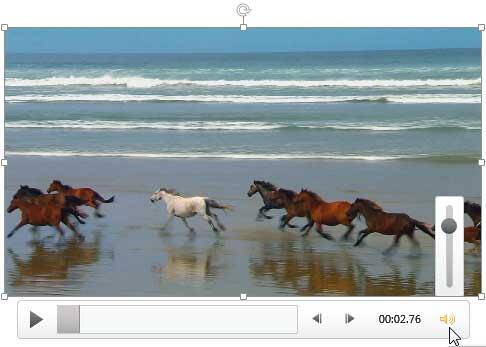
Figure 3: Volume drop-down menu - Note that you are restricted to setting the volume at only the Low, Medium, and High levels using the Volume drop-down menu. On the other hand, you can set the volume to whichever level you want by clicking on the Volume button on the Player Controls bar below the actual video clip on the slide, as shown in the bottom right of Figure 4, below.

Figure 4: Volume button in the Player Controls bar - You can also increase or decrease the volume of the selected video clip by pressing the Alt + Up Arrow or Alt + Down Arrow keys together.
B. Start
- Here you can specify how you want your video to start during your presentation. Click the Start list to bring up a drop-down menu, as shown in Figure 5, below.

Figure 5: Start drop-down menu - There are two options within the Start drop-down menu:
i. Automatically
- Plays your video when the slide (containing the video) appears in Slide Show view, automatically. If other events are set to occur before your video plays, you can find them all within the Animation Timeline.
ii. On Click
- Plays your video by clicking on the video itself in Slide Show view.
Playing Video Across Slides?
- PowerPoint 2007 also provided you with a third option in the Start drop-down list called Play Across Slides, which has been removed in PowerPoint 2010 and 2013. Fortunately, it is easy to get back to that option with a workaround we explain in our Playing Video Across Slides in PowerPoint 2013 tutorial.
C. Play Full Screen
- Select this check-box to play your video clip so that it fills the entire screen area in Slide Show view. Note that once the video clip has finished playing, the sequence moves back to the active slide so that you can move to any other slide, as required.
The File Type Matters
- The full-screen option works differently for different video formats and individual files. Formats such as AVI and MOV typically play full screen. Other file formats such as MPG, MP4, and WMV video clip may fit the height or width of the screen.
D. Hide While Not Playing
- Select this check-box to hide your video clip in Slide Show view. This option makes sense only if you set the Start option for the video to be Automatically (see Figure 5).
E. Loop until Stopped
- Plays your video repeatedly and continuously when the active slide is shown.
F. Rewind after Playing
- Select this check-box to rewind your video after playing during your presentation. Choosing this option is helpful if you need to play the same clip more than once during your presentation.
- Choose options based on your requirements.
- Make sure to save your presentation often.
See Also:
14 04 04 - Video in PowerPoint - Advanced: Advanced Video Options in PowerPoint (Glossary Page)
Advanced Video Options in PowerPoint 2016 for Windows
Advanced Video Options in PowerPoint 2010 for Windows
You May Also Like: Can You Hear Me?: Conversation with Nick Morgan
| Food PowerPoint Templates
Popular Posts

Pivot Tables in PowerPoint: by Kasper LangmannOne of the most commonly used features in Microsoft Excel is the Pivot Table. A Pivot Table simply allows you to make better sense of data by giving you different options of how to view that data.
Handmade Slides: Pushpins for PowerPoint
These “pushpin” graphics are already placed in PowerPoint slides. Just copy them and paste within your slides to create a look that makes a picture, shape, or anything else appear as if it has been pushed onto a surface, board, or wall with a pin!
These ready-made pushpins are already within PowerPoint slides, and have been provided in five colors. Just copy them and paste them on your slides.
Download these Pushpins for just $19.99


