Introduction
About Adobe Presenter 7
Download and Installation
Using Adobe Presenter 7 - Part I
Continued on Page 2
Introduction
Adobe Presenter 7 is a PowerPoint add-in that allows you to create high-impact Adobe Flash presentations and eLearning courses from PowerPoint. In addition, you
can also create high fidelity PDFs using this add-in. You can add narration, edit audio, add multimedia capture video, animations, interactivity, quizzes, surveys,
and software simulations to eLearning courses created using Adobe Presenter, all inside PowerPoint. Output can be customized as presentations published to Flash,
PDF or Adobe Connect Server.
Adobe Presenter 7 is available as a standalone product, or as part of the Adobe eLearning Suite.
Back
About Adobe Presenter 7
Adobe Presenter 7 is from Adobe, a San Jose, California, USA (corporate headquarters) based company that also creates well
known programs like Photoshop, Flash, Illustrator, Dreamweaver, etc. You can learn more about Adobe Presenter (part of the
Adobe eLearning Suite) and download a free trial version
from their site.
Here is the list of key features in Adobe Presenter 7:
- Transform your Microsoft PowerPoint file into an Flash presentations with narration and interactivity.
- Import and edit video in any format and export as SWF.
- Record and edit audio.
- Create quizzes and surveys with question polling and randomization.
- Publish content as a PDF file, preserving all of your animations.
- Create AICC and SCORM compliant content.
- Integrate with Adobe Acrobat® Connect™ Pro software to deploy, manage, deliver, and track content.
Back
Download and Installation
You can download the installer from the site link provided earlier in this review. Run the setup routine and follow the instructions. Once installed, you can access
Adobe Presenter 7 from a new Ribbon tab within PowerPoint 2007, as shown in Figure 1.

Figure 1: Adobe Presenter Ribbon tab within PowerPoint
For users of previous versions of PowerPoint, you'll find a new Adobe Presenter menu that provides the same options.
For the first time when the application is launched, you will be asked to activate the product, or use it in trial mode (“Activate Later”).
Back
Using Adobe Presenter 7 - Part I
Follow these steps to get started with Adobe Presenter 7:
- Open any presentation in PowerPoint, and then choose the following
options from the Adobe Presenter tab of the Ribbon.

Figure 2: Adobe Presenter tab within PowerPoint
- The Adobe Presenter tab of the Ribbon comprises seven groups: Presentation,
Audio, Video, Flash, Quiz, Application and Help. Each of these are explained below:
A. Presentation
This group has three options:
- Publish opens the Publish Presentation dialog box, as
shown in Figure 3. The Publish window enables you to choose different output options based on formats.
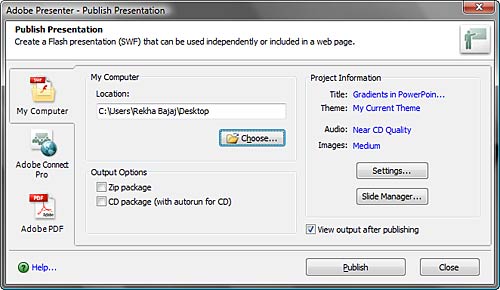
Figure 3: Publish Presentation
- Slide Manager opens the Slide Manager dialog box (see Figure 4). Here you can view and edit individual slide properties.
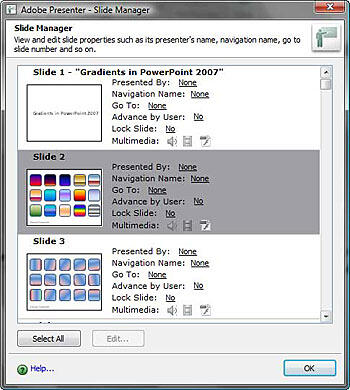
Figure 4: Slide Manager
- Settings opens the Presentation Settings dialog box that you can see in Figure 5. Here you can customize the appearance such
as title, summary and player themes.
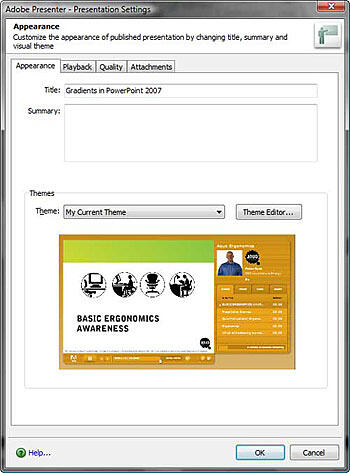
Figure 5: Presentation Settings
B. Audio
This group provides four options:
- Record allows to record a narration for the presentation slide. When you record for the first time, you see the microphone test dialog box that
you see in Figure 6.
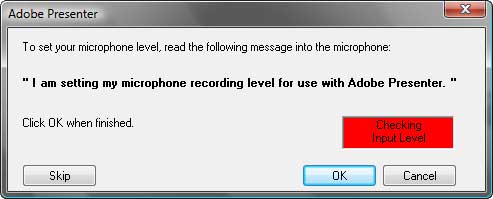
Figure 6: Test your microphone
- Import (see Figure 7) allows you import audio already recorded and edited within a program such as Adobe Audition or Adobe
Soundbooth to individual slides.
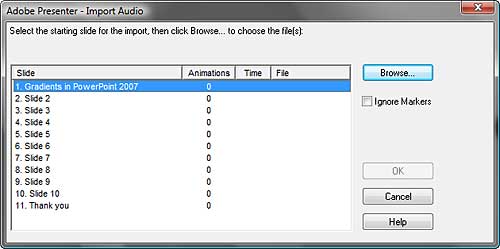
Figure 7: Import Audio
- Sync (see Figure 8) allows to synchronize the audio file to animation events in a slide.
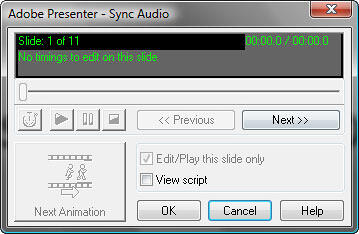
Figure 8: Sync Audio
- Edit (see Figure 9) allows to edit out mistakes and awkward pauses using a functional editor.
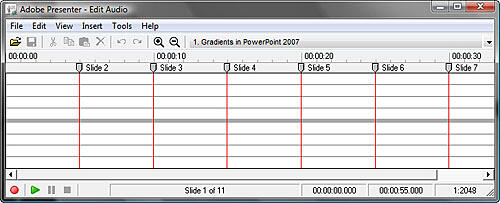
Figure 9: Sync Audio
C. Video
This group has three options:
- Capture (see Figure 10) -- here you can directly capture video from a capture device (like a webcam) and insert it in
presentation as slide video or as sidebar video on a slide, or save it to disk.
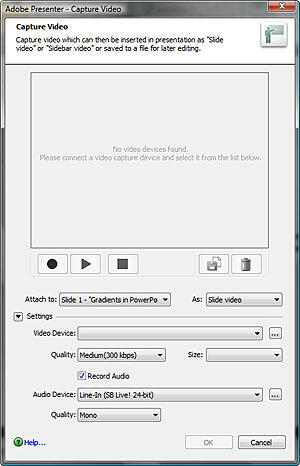
Figure 10: Capture
- Import opens the Import Video window. Navigate to the folder were the videos are saved, and select any video and click Open to import a video into
the slide. The imported video will be embed as FLV in the slide.
- Edit (see Figure 11) lets you trim the unwanted part of the video, add fade effect, mute audio of the video, and set the playing
time, etc.
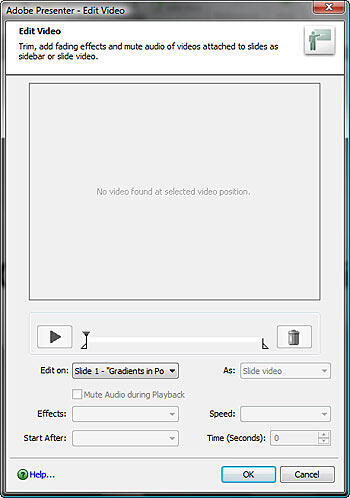
Figure 11: Edit Video
We look at the other groups in the next page
Continued on Page 2


