Microsoft 365 applications work well with cloud platforms such as OneDrive. Roaming capabilities enable when you log into your Microsoft account within Office applications such as PowerPoint. Once logged in, all your settings, including your recent files or templates, will be synced across all your devices, including laptops, tablets, and even smartphones.
The process explained in this tutorial works the same way in Word, Excel, and other Office programs. Also, once you follow the process within any one Office program, the services are linked for all programs, and even for your Microsoft account.
Follow these steps to add these services from within PowerPoint 365 for Windows:
- If you have launched PowerPoint, choose Account, as shown highlighted in green within Figure 1, below. Alternatively, if you already have a presentation open, choose the File menu to bring up the Backstage view, and select Account.
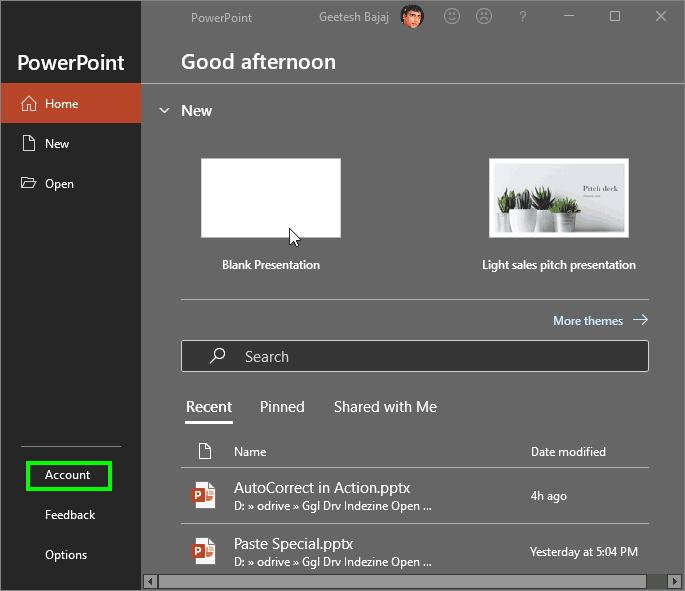
Figure 1: PowerPoint's Backstage view - Doing so brings up the Accounts window within the Backstage view, as shown in Figure 2, below.
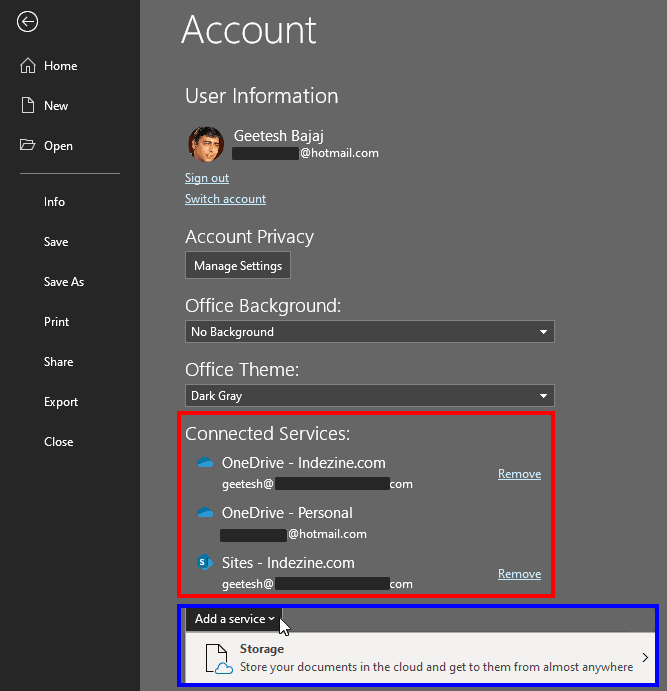
Figure 2: Account window within Backstage view - Within the Account window, you'll find the Connected Services section, as shown highlighted in red within Figure 2, above that lists services added for PowerPoint. For now, we have added two OneDrive accounts, and a SharePoint site. To add another service, click the Add a service button to bring up a drop-down menu, as shown highlighted in blue within Figure 2.
- Within the Add a service drop-down menu, you'll find just one option:
- Storage: This option lets you store your documents and files in the cloud so that you can access them from anywhere. When this option is selected it brings up a sub-menu, as shown in Figure 3, below. Within the sub-menu, you'll find two online storage sites: OneDrive and OneDrive for Business.

Figure 3: Storage sub-menu
More Services
- The availability of connected services may differ. Microsoft may add more services in the future or change their availability based on your location.
- Choose any of the services you want to add. For this tutorial, we chose the OneDrive option. Do note that we already have another OneDrive account connected, so choosing OneDrive will allow us to link to another OneDrive account. PowerPoint brings up a window, as shown in Figure 4, below. Type in the email address associated with your OneDrive account and click the Next button, highlighted in red within Figure 4.
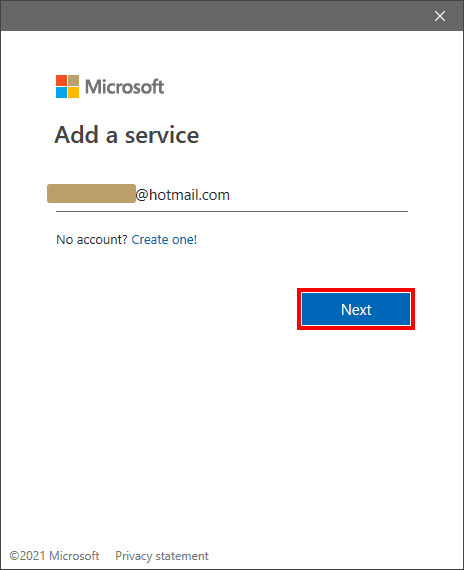
Figure 4: Add a service window - Doing so opens another window, as shown in Figure 5, below. Here you need to enter your password. Once done, click the Sign in button, shown highlighted in red within Figure 5.
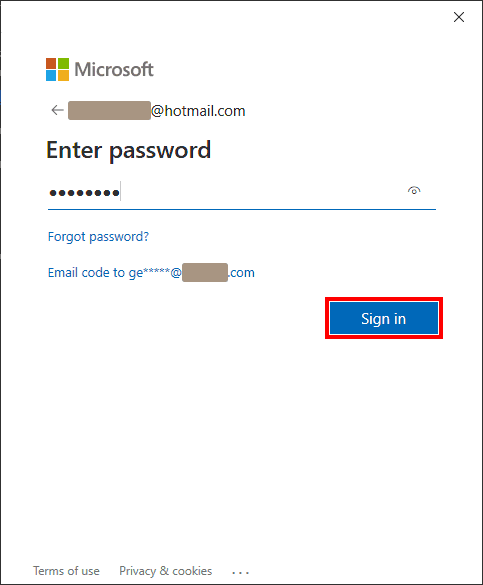
Figure 5: Sign in to your Microsoft account - You will see a message window showing that a place is being added, as shown in Figure 6, below. If everything goes well, this message window will disappear soon.
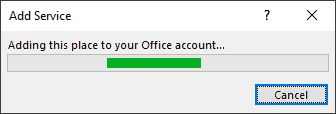
Figure 6: Adding a service - This action will add the new OneDrive service within the Connected Services list, as shown highlighted in red within Figure 7, below.
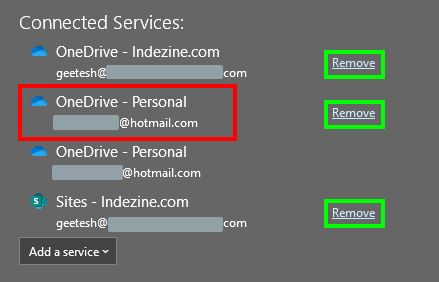
Figure 7: Another OneDrive service added within the Connected Services list - Do you see the Remove links next to all the connected services, as shown highlighted in green within Figure 7, above. You can click on these links to remove these services. Do note that one of the OneDrive services does not possess a Remove link. That's because your Microsoft 365 license may be connected to this particular OneDrive account.
- You can similarly add other services to connect with your Microsoft account. These services will then integrate within your Microsoft 365 programs, including PowerPoint.


