When you insert a video in your presentation, you might see that the placed video clip displays a blank or black rectangle on the slide, as shown in Figure 1, below.
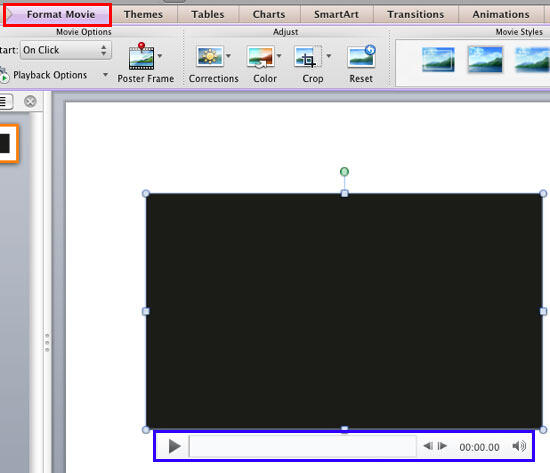
Figure 1: Movie before adding a Poster Frame
If your video clip does not show a black rectangle, then of course there is no issue concerned. However, if it does show this black rectangle, your viewers may not find this appealing at all.
With PowerPoint's Poster Frame feature, you can easily overcome this limitation, and change the black rectangle to an image by selecting a frame from the video itself, or even a picture from a different source. Also, the Poster Frame feature presents a good option for displaying a company logo or a picture of the speaker in the video. The Poster Frame is a frame that appears first even before the video starts playing in the Slide Show view.
If you do see a black rectangle in your inserted video, or if you want to change the frame visible, then you can add a Poster frame for it in two ways:
- Include a frame from the video itself.
- Insert an image such as an external JPG or PNG.
In this tutorial, you will learn about both these ways to add a poster frame for your video clips in PowerPoint 2011 for Mac:
Add Poster Frame from the Video itself
- Open your presentation, and navigate to the slide that contains a video clip. Select the video clip to bring up the Format Movie tab of the Ribbon as shown highlighted in red within Figure 1, previously on this page. Activate the tab by clicking on it.
- Make sure you are in Normal editing view. Then, play the video clip through the Player Control bar, as shown highlighted in blue within Figure 1, previously on this page. Your video clip now starts playing, as shown in Figure 2, below. When you reach the frame that you want to display as a poster frame, pause the video by clicking the Pause button, highlighted in red within Figure 2.
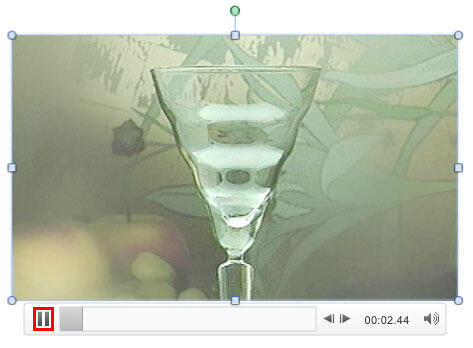
Figure 2: Pause button within the Player Control bar - Doing so pauses the video, and the Pause button will change to the Play button, as shown highlighted in red within Figure 3, below. Make sure that you see the frame at which you paused the video. If this is not the frame you want to use for your Poster frame, you can continue clicking the Play and Pause buttons until you are paused at the frame you want to use for your Poster frame.
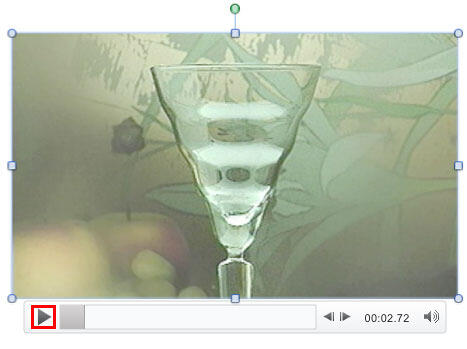
Figure 3: Paused video shows a frame - Now, within the Format Movie tab, click the Poster Frame button, as shown highlighted in red within Figure 4, below, to access the Poster Frame drop-down gallery that you can see in Figure 4. Within this drop-down gallery select the Current Frame option, as shown in Figure 4.
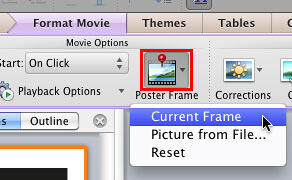
Figure 4: Current Frame option within the Poster Frame drop-down gallery - This sets the preview image for the active video clip to the current frame. The Player Control bar now displays a message that the poster frame is set, as shown highlighted in red within Figure 5, below.
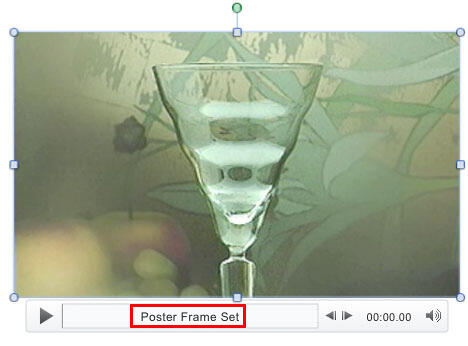
Figure 5: Current frame set as Poster Frame
Add Image as a Poster Frame
Follow these steps to set an image as a Poster Frame for your video:
- Select the inserted video clip on your slide. Now, access and click Poster Frame button, as shown highlighted in red within Figure 6, below. As explained in the preceding section, you will see the Poster Frame drop-down gallery. Within the Poster Frame drop-down gallery, select the Picture from File option, as shown in Figure 6.
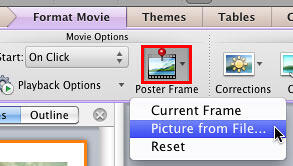
Figure 6: Picture from File option to be selected - Doing so opens the Choose a Picture dialog box, as shown in Figure 7, below. Navigate to the folder where your pictures are located, and you will see icons or thumbnails of the pictures. Select the picture you need, and click the Insert button, as shown highlighted in red within Figure 7.
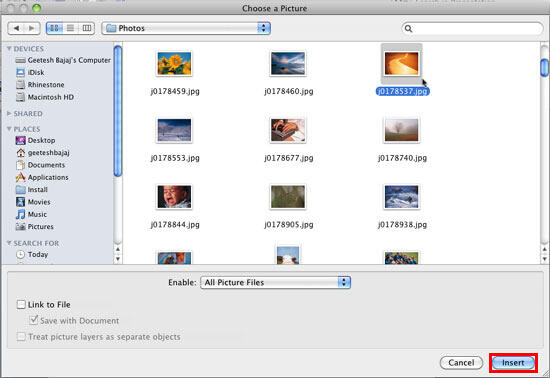
Figure 7: Choose a Picture dialog box - Doing so will set the preview image for the video clip to the selected image. The player controls box now displays a message that the poster frame is set, as shown highlighted in red within Figure 8, below.
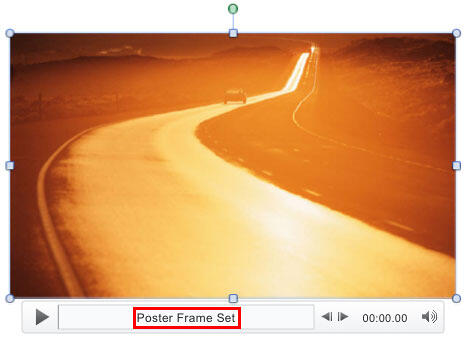
Figure 8: Image set as Poster Frame - Make sure to save your presentation.
Remove the Poster Frame
If you want to remove the Poster Frame at any point of time, first make sure that your movie clip is selected. Then, simply navigate to the Poster Frame drop-down gallery, and choose the Reset option, as shown in Figure 9, below.
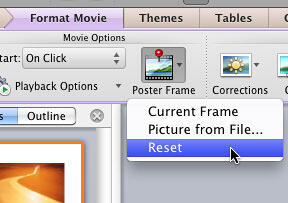
Figure 9: Reset option


