Using the different Slide Layouts in
PowerPoint, you can create good looking slides. For example, you can use the ready-made layouts available that contain pictures or
charts or you could use a separate layout for the opening slide. These layouts can
be edited or duplicated/renamed
within Slide Master view to create even more Slide
Layouts. While duplicating and editing Slide Layouts is a great way to make small changes, it's not the same as creating a Slide
Layout from scratch. As an analogy, duplicating and editing a Slide Layout is more like using a coloring book to fill color between
the lines of pre-drawn art -- but creating your Slide Layout from scratch is more like starting with a blank sheet of paper and
drawing your art before you start coloring between the lines. You can decide which of these approaches works best for you.
Follow these steps to create a new Slide Layout in PowerPoint 2016:
- Launch PowerPoint. You will see
the Presentation Gallery. Here,
select the Blank Presentation to open a blank presentation with a new slide. Access the View
tab of the Ribbon and click
the Slide Master button, as shown highlighted in red within
Figure 1.
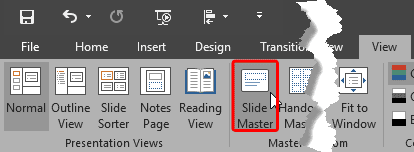
Figure 1: Slide Master button- This opens the Slide Master view, as
shown in Figure 2. In Slide Master view, you'll see that the left pane contains two distinctly different
elements: a larger thumbnail representing the Slide Master (highlighted in red
within Figure 2) and several smaller slide thumbnails below representing individual
Slide Layouts (highlighted in blue within Figure 2).
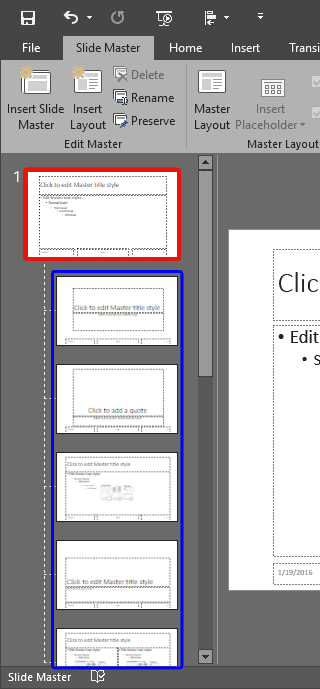
Figure 2: Slide Master and Slide Layouts within PowerPoint- To add a new slide layout, click in between the layout thumbnails to place an insertion cursor, as shown in
Figure 3. We placed our insertion cursor right below the Slide Master thumbnail at the
position of the first Slide Layout.
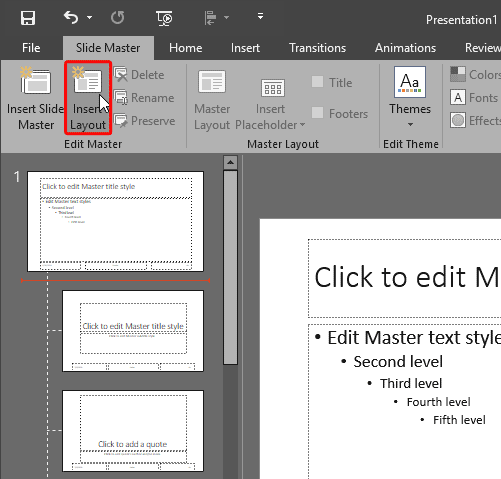
Figure 3: New Slide Layout insertion point- Within the Slide Master tab of the Ribbon, click the
Insert Layout button, as shown highlighted in red within
Figure 3 above. Alternatively, you can also right-click at the insertion point to bring up a contextual menu,
as shown in Figure 4. From this menu, choose the Insert Layout option.
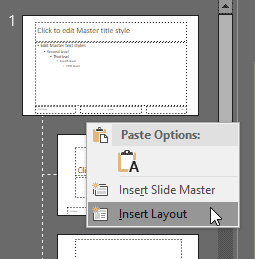
Figure 4: Insert Layout option- Either way, you will add a new Slide Layout at the position of insertion point. In
Figure 5, below you can see the new Slide Layout selected within the left pane (indicated by
the orange highlight) and the same Slide Layout can be seen within
the Slide Area (highlighted
in blue).
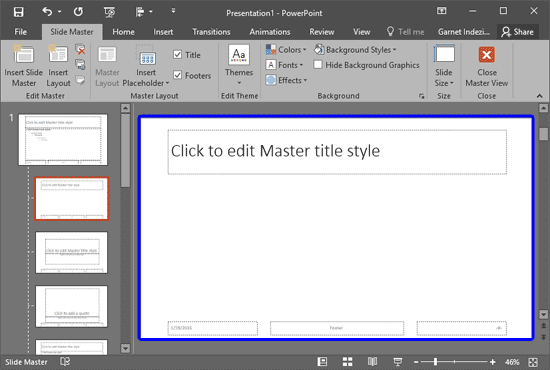
Figure 5: New Slide Layout added- By default the new Slide Layout added has a name that PowerPoint automatically provides—it's
called Custom Layout. To rename the Slide Layout, right-click on the thumbnail, and from the
contextual menu that appears, choose the Rename Layout option. This brings up the Rename Layout
window, as shown in Figure 6. Within this window, you can see the default name (highlighted
in red within Figure 6). Just over type the default name with the new name (we
renamed our new layout Sample Layout), and click the Rename button.
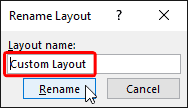
Figure 6: Rename Layout window- Notice that our new Sample Layout (see Figure 5, above) already has
Title and Footers placeholders. You may remove these placeholders using the two check-boxes
named Title and Footers (highlighted in red
within Figure 7) within the Slide Master contextual tab.
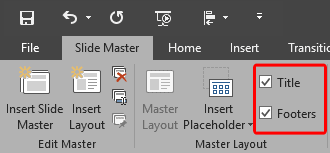
Figure 7: Title and Footers check-boxes- Make sure that the newly added Slide Layout is selected, and deselect both the check-boxes, as shown highlighted
in red within Figure 8. This will remove both the placeholders from the newly added
Slide Layout, as you can see highlighted in blue
within Figure 8.

Figure 8: Title and Footers removed from new Slide Layout- Select the check-boxes again, and all these placeholders will show up again, as shown in
Figure 5, earlier on this page.
- When done, click the Close Master View button on the Slide Master tab of
the Ribbon (to locate the the Close Master View button, refer to Figure 8
above). This will get you back to Normal View.
- Access the Home tab of the Ribbon and click the Layout button
to bring up the Layout drop-down gallery you see in Figure 9, below. Notice that your new layout
shows up here (highlighted in red within Figure 9), ready to be used in your
presentation. Once your layout has been added, it's time to add new placeholders to the created layout. We explain the
process in our Inserting New Placeholders
in Slide Layouts in PowerPoint 2013 tutorial.
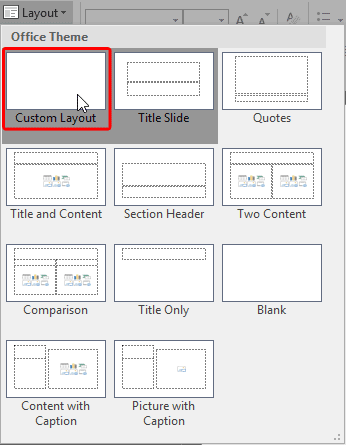
Figure 9: New Slide Layout within Layout drop-down menu- Save your presentation often.


