After inserting an organization chart (org chart) in PowerPoint 2010, you might need to add more shapes to your org chart. The default org chart that PowerPoint places has a few shapes, but you might want to add more shapes as well as add more hierarchy levels for the new shapes. Fortunately, you can make these additions and edits with just a click or two.
Follow these steps to add more shapes to your org chart in PowerPoint 2010 for Windows:
- Select your existing organization chart, as shown in Figure 1, below.
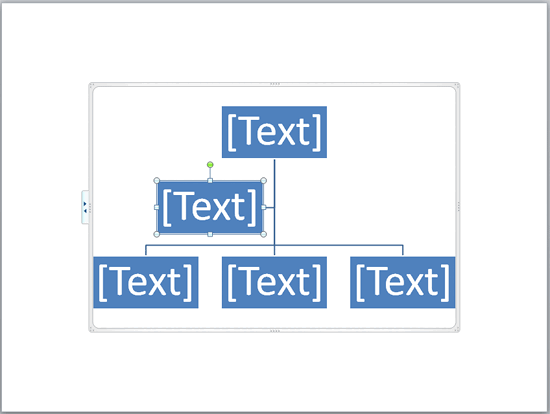
Figure 1: Organization chart - When the organization chart is selected, you'll find two contextual tabs activated on the Ribbon. These are the SmartArt Tools Design and the SmartArt Tools Format tabs, as shown highlighted in red within Figure 2, below.
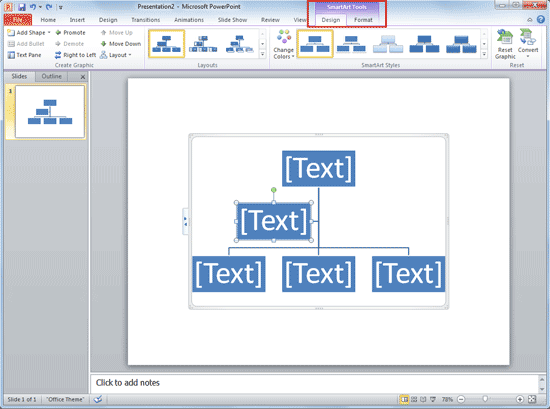
Figure 2: SmartArt Tools Design and Format tabs on the Ribbon Contextual Tabs
- The SmartArt Tools Design and the SmartArt Tools Format tabs are contextual tabs. These tabs are special tabs in the Ribbon that are not visible all the time. They only make an appearance when you are working with a particular slide object which can be edited using special options.
- Now, select any individual shape within the SmartArt graphic and activate the SmartArt Tools Design tab on the Ribbon, as shown in Figure 2, above.
- Within this tab, click the Add Shape button located within Create Graphic group to view the drop-down gallery, as shown in Figure 3, below.
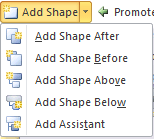
Figure 3: Add Shape drop-down gallery - Alternatively, you can right-click the selected shape to bring up the resultant contextual menu, as shown in Figure 4, below. Then, choose the Add Shape option. Note that options here are the same as the ones within the Add Shape gallery, as shown in Figure 3, above.
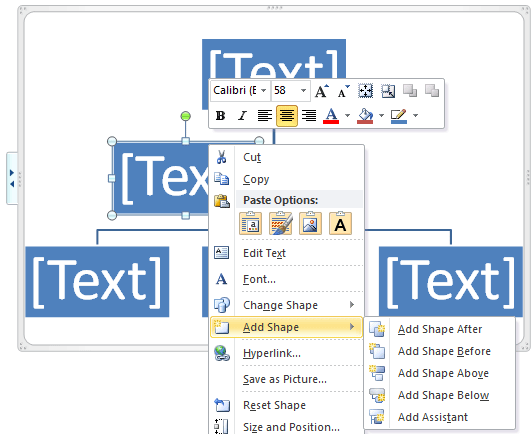
Figure 4: Add Shape submenu - These options are explained below:
Add Shape After
- To insert a shape at the same level as the selected shape (to create an adjacent shape), click the Add Shape After option, as shown in Figure 5, below. This option works best when you want to add another person at the same organizational level as the shape you selected. The new shape is placed to the right of the original shape.
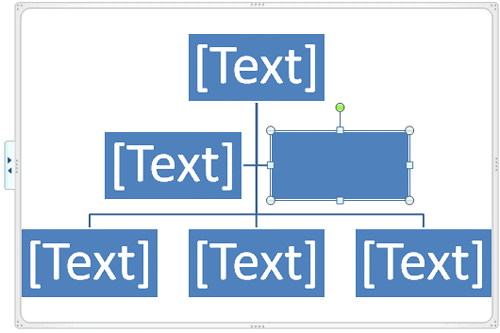
Figure 5: Shape added after the selected Shape Add Shape Before
- To insert a shape at the same level as the selected shape (again creates another shape adjacent to the selected shape), click the Add Shape Before option, as shown in Figure 6, below. This option works best when you want to add another person at the same organizational level as the shape you selected. The new shape is placed to the left of the original shape.
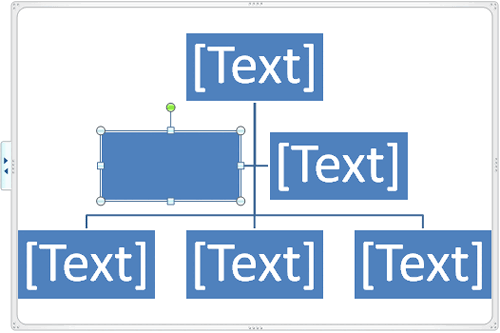
Figure 6: Shape added before the selected Shape Add Shape Above
- To insert a shape one level above the selected shape, click the Add Shape Above option, as shown in Figure 4, previously on this page. This option adds a new shape in the hierarchy level above the selected shape, as shown in Figure 7, below. If a shape already existed in the hierarchy level above the selected shape, this option adds a new hierarchy level with one shape between the original two shapes.
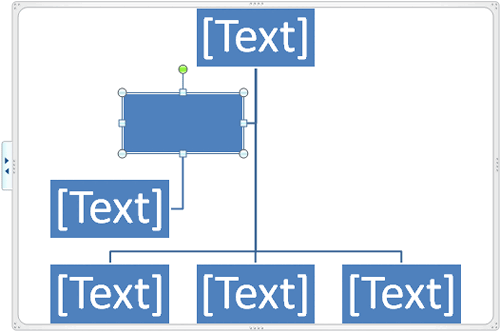
Figure 7: Shape added above the selected Shape Add Shape Below
- To insert a shape one level below the selected shape, click the Add Shape Below option, as shown in Figure 8, below. This option adds a new shape in the hierarchy level below the selected shape. If a shape already existed in the hierarchy level below the selected shape, this option adds a new independent, hierarchy level, as shown in Figure 8.

Figure 8: Shape added below the selected Shape Add Shape Assistant
- To place an assistant shape below the selected shape, select the Add Shape Assistant option. This option places a shape at an intermediate level, but lower than the selected shape, as shown in Figure 9, below. Do remember that the Assistant option has no real hierarchy level since these positions (such as a secretary) are often linked to the shape (such as the boss), for whom they are the assistant. So, a secretary to the Vice President of a company remains his or her secretary when the Vice President is promoted to become the President.

Figure 9: Shape added as Assistant of the selected Shape - Save your presentation.
Delete Shapes Within Organization Charts
To delete a shape within an org chart, just select the shape you want to remove and press the Delete key on your keyboard.


