The Edit Points option gives you
control over how you want a shape to look, but sometimes you might find it difficult to edit a certain segment in a
shape because there are no points available to manipulate. Conversely, there could be far too many points! PowerPoint
provides a simple solution for this problem: you can add and delete vertexes from a shape.
Note: In PowerPoint, the terms vertex and point are often used interchangeably.
Add Points (Vertexes)
Follow these steps to add vertexes in PowerPoint 2016 for
Windows:
- To add a vertex to a shape, select
a shape. You can use any shape; for this tutorial, we used a Rectangle. Right-click the shape and
choose the Edit Points option from the context menu to
switch to Edit Point mode.
- Now place the cursor on top of the outline of the shape where you want to add a new vertex (point).
The cursor will change to a rectangle with a plus sign, as shown highlighted in red within
Figure 1.
-
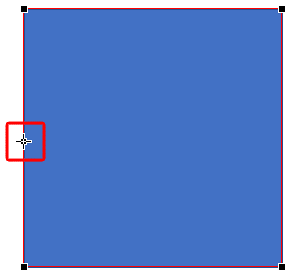
Figure 1: Place cursor to add point
- Now right-click carefully, and from the resultant menu, choose the Add Point option, as you
can see in Figure 2.
-
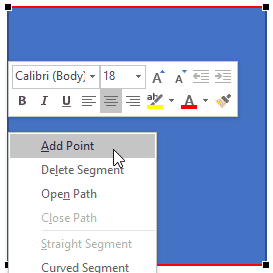
Figure 2: Add Point option
- This will add a new point (vertex) to the shape (highlighted in red within
Figure 3). You can add as many points you want.
-
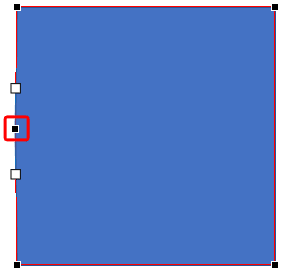
Figure 3: New point added to the shape
- Alternatively, you can quickly add a new vertex to the shape without any right-clicking. To do that,
first make sure you are in Edit Points
mode. Then place the cursor on the outline of the shape where you want to add a new vertex (point), as shown in the shape
towards the left in Figure 4 (highlighted in red). Then,
Ctrl + click. This adds a new vertex at the cursor position as shown in the shape towards the
right in Figure 4.
-
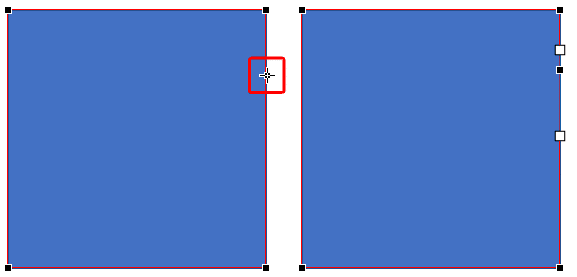
Figure 4: Ctrl+click the line segment to quickly add a new vertex to the shape
Delete Points (Vertexes)
Follow these steps to delete existing vertexes:
- Make sure you are in Edit Points
mode; right right-click and choose the Edit Points option from the contextual menu.
- Place the cursor over the point you want to delete. The cursor will change to a four-directional arrow,
as shown highlighted in red within Figure 5.
-
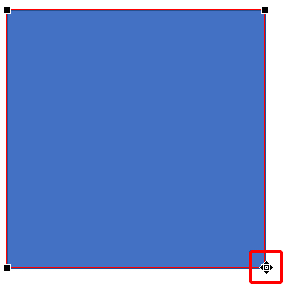
Figure 5: Place cursor over the point to delete it
- Right-click carefully to bring up the context menu, as you can see in Figure 6. From this
menu, choose the Delete Point option.
-
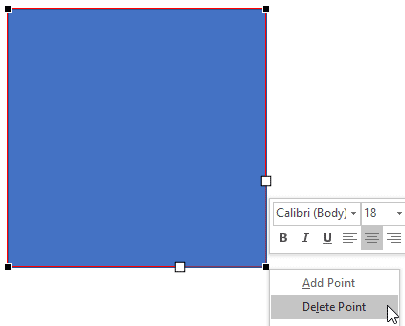
Figure 6: Delete Point option
- This will delete the selected point of the shape (see Figure 7). Deleting a point changes
the shape completely, as you can see in Figure 7 where a rectangle is transformed to a triangle. So be
extra careful while deleting points!
-
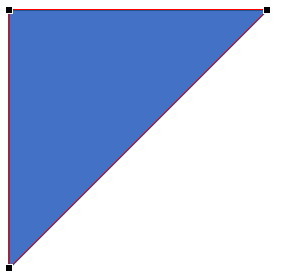
Figure 7: Point deleted from the shape
- Alternatively, you can quickly delete a vertex (point) from the shape without any right-clicking. To do that,
make sure you are in Edit Points mode. Then
place the cursor on the vertex you want to delete and hold down the Ctrl key. This changes the
cursor to a cross as shown in the shape towards the left in Figure 8 (highlighted in
red). With the Ctrl key still held, click on the point to delete it.
You can see the result of this deletion in the shape shown towards the right in Figure 8.
-
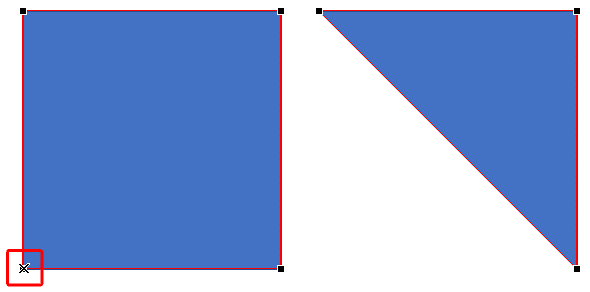
Figure 8: Ctrl+click the vertex to quickly delete it from the shape


