In a previous tutorial, you have learned how you can
edit points (vertexes) of a
selected shape to alter its structure. These vertexes let you control how a shape looks -- but sometimes you might find
it difficult to edit a certain segment in a shape because there are no vertexes (points) available to manipulate -- or
maybe there are far too many points! PowerPoint provides a simple solution for this problem -- you can add and delete
vertexes from a shape.
Note: In PowerPoint terminology, the terms vertex and point are often used interchangeably.
Add Points (Vertexes)
Follow these steps to add vertexes in PowerPoint 2011 for
Mac:
- To add a a vertex to a shape,
select the shape (you can use
any shape, for this tutorial we have used a Diamond) and
switch to Edit Point mode (just
right-click and choose Edit Points option). Now place the cursor on top of the outline of the shape where
you want to add a new vertex (point) - the cursor will change to a square with a plus sign, as shown in
Figure 1 (highlighted in red).
-
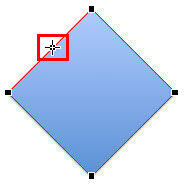
Figure 1: Cursor positioned to add a point
- Now, right-click (or Ctrl-click) to get the contextual menu -- from this menu, choose
the Add Point option, as you can see in Figure 2.
-
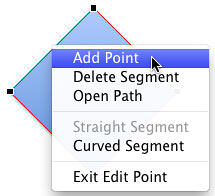
Figure 2: Add Point option selected
- This will add a new point (vertex) to the shape at the cursor position (see Figure 3).
Similarly, you can add as many points you want -- thereafter
edit these points as required
to alter the shape.
-
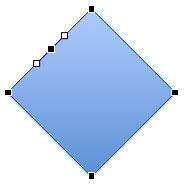
Figure 3: New point added to the shape
- Alternatively, you can quickly add a new vertex to the shape without any right-clicking. To do that,
first make sure you are in Edit
Points mode. Then place the cursor on the outline of the shape where you want to add a new vertex (point), as shown
in the shape towards the left in Figure 4 (highlighted in red). Then, just
hold the Ctrl key and click. This adds a new vertex at the cursor position as shown in the
shape towards the right in Figure 4.
-
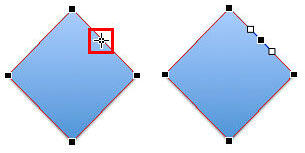
Figure 4: Ctrl+click the line segment to quickly add a new vertx to the shape
Delete Points (Vertexes)
Follow these steps to delete existing vertexes:
- Make sure you are in
Edit Points mode (just
right-click and choose Edit Points option). Place the cursor over the point you want to delete --
the cursor will change to a small square with four directional arrows around it, as shown highlighted in
red, in Figure 5.
-
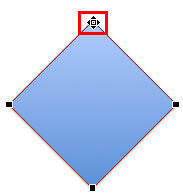
Figure 5: Place cursor over the point to be deleted
- Right-click (or Ctrl + click) to get the contextual menu. From this contextual menu,
choose the Delete Point option shown in Figure 6.
-
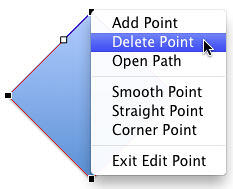
Figure 6: Delete Point option selected
- This will delete the selected point of the shape (see Figure 7). Deleting a point changes
the shape completely, as you can see in Figure 7 where a diamond is transformed to a triangle.
-
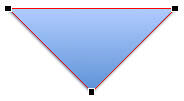
Figure 7: Deleting a point from the shape can change the shape
- Alternatively, you can quickly delete a vertex (point) from the shape without any right-clicking. To do
that, make sure you are in Edit
Points mode. Then place the cursor on the vertex you want to delete as shown in the shape towards the left in
Figure 8 (highlighted in red). Then hold down the
Option (alt) key and click on the point to delete it. You can see the result of this deletion
in the shape shown towards the right in Figure 8.
-

Figure 8: Option+click the vertex to quickly delete it from the shape
- Save your presentation.


