Combine Shapes are a set of four hidden commands in PowerPoint 2010 for Windows
that are not available by default from any of the Ribbon tabs.
With the capabilities of these powerful commands, you can edit and even combine shapes to create your own shapes! These four Combine Shape
commands are:
- Shape Combine
- Shape Intersect
- Shape Subtract
- Shape Union
In this tutorial we'll make the Combine Shapes feature accessible and visible on the
Quick Access Toolbar (QAT) in PowerPoint 2010. Then, we'll
show you how you use these commands in successive tutorials. To add these commands to the QAT, follow these steps in
PowerPoint 2010 for Windows:
- We recommend that you first relocate the QAT if it is in the default position (above the Ribbon), as shown highlighted
in red within Figure 1. We suggest you do so because there's very little screen real estate
in the default position to add more commands to the QAT. Placing the QAT in an alternative position gets you more screen real estate,
as you will see in the subsequent steps of this tutorial.
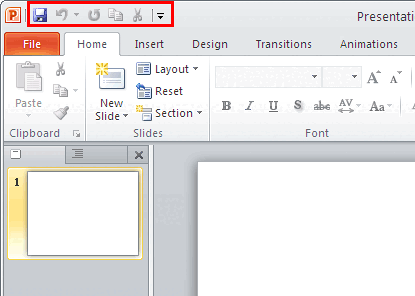
Figure 1: QAT above the Ribbon
- Right click on the QAT to bring up the menu you see in Figure 2.
Now, choose the Show Quick Access Toolbar Below the Ribbon option.
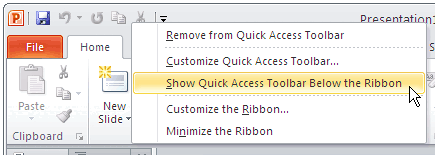
Figure 2: Show Quick Access Toolbar Below the Ribbon option
- This places the QAT as a long strip below the Ribbon, as
shown highlighted in red within Figure 3.

Figure 3: QAT below the Ribbon
- Now you have to customize the QAT so that
you can add the Combine Shape commands. To do that, right click on the QAT, and choose Customize Quick Access Toolbar option,
as shown in Figure 4.
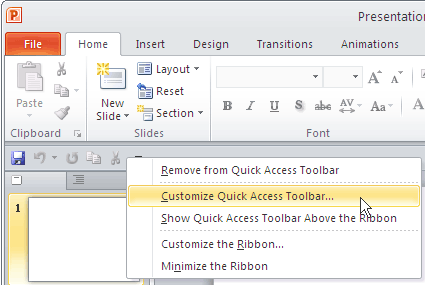
Figure 4: Customize Quick Access Toolbar option
- This opens the PowerPoint Options dialog box with the Quick Access Toolbar tab active, as
shown in Figure 5.
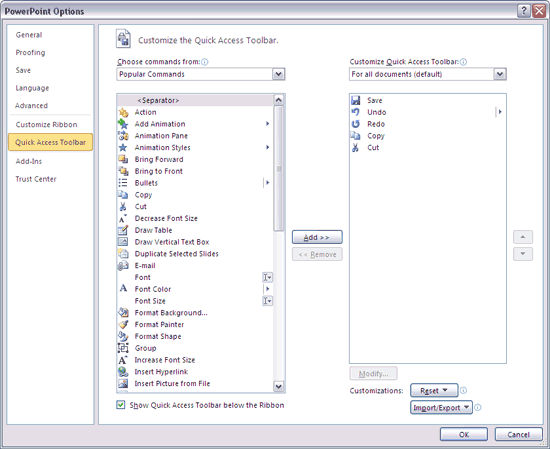
Figure 5: PowerPoint Options dialog box
- From the Choose commands from drop down, select Commands Not in the Ribbon (refer to
the highlighted red area on the top left within Figure 6, below).
- Scroll down the list immediately below until you find the Shape Combine, Shape
Intersect, Shape Subtract, and Shape Union commands (refer to the highlighted
red area roughly in the center of Figure 6).
- Select these four commands one at a time, and click the Add button for each of them so that they show up in the Customize Quick Access Toolbar section (refer the highlighted red area on the right within
Figure 6).
Click the OK button to add the four Combine Shape commands to your QAT.
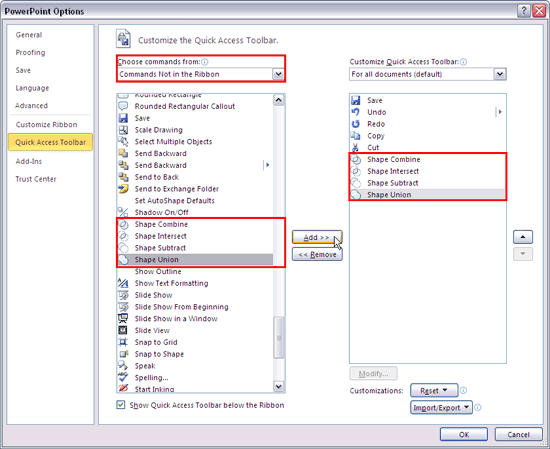
Figure 6: Adding the Combine Shapes commands in Quick Access Toolbar
- This will add the four Combine Shape commands to the QAT highlighted in
red within Figure 7).
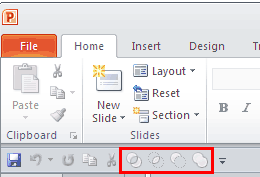
Figure 7: Combine Shape commands added to the QAT
Note: The added Combine Shape commands in QAT are grayed out (refer to Figure 7, above) because no shape on the
slide is selected.
Once these Combine Shape commands have been added to the QAT, you can use them individually as explained in the following tutorials:


