If you want your inserted video clip to play from a certain point within the video clip, you can actually trim the video so that it only plays the parts you want. However, there is another elegant solution that lets you achieve the same results, and do even more. This feature is called a Bookmark. It is similar to the conventional bookmarks you place within the pages of a book you are reading. Just like how you can easily go to that particular page with the help of a bookmark, the Bookmark you add to a video clip becomes an indicator of the time position you want to access.
You can thus quickly access that position within the video clip without having to manually scrub within the Player Controls bar. In addition, you can also combine Bookmarks with Trigger animations, so as make a click result in playing a video clip from the Bookmark position you added.
Follow these steps to learn how to add a Bookmark to video clip in PowerPoint 2016 for Windows:
- Open your presentation, and navigate to the required slide where you have already inserted a video clip. Select or double-click the video clip to bring up the two Video Tools tabs in the Ribbon, Format and Playback. Click the Playback tab to activate it, as shown highlighted in blue within Figure 1, below.
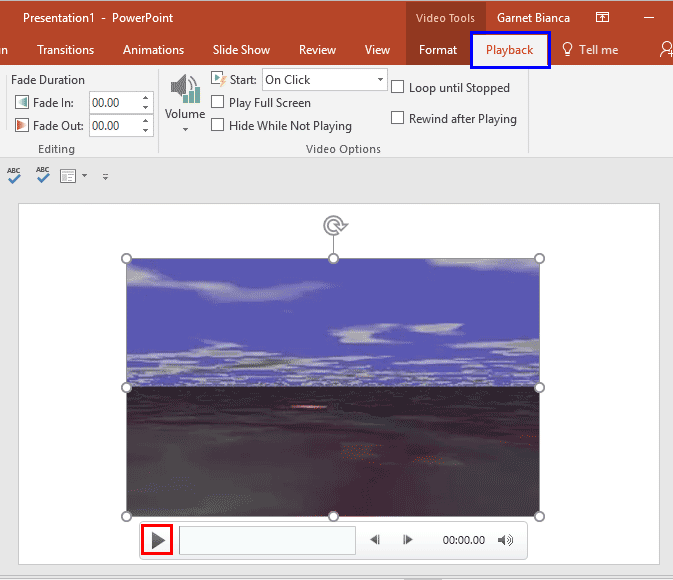
Figure 1: Video Tools Playback tab of the Ribbon - Now, ascertain where you want to add the Bookmark. There are three ways to do so:
- Click the Play button, as shown highlighted in red within Figure 1, above, to play the video clip. While playing, the Play button will become the Pause button. Now, click the Pause button at the position where you want to add a bookmark. In Figure 2, below, you can see that our position is set at 00:00:78.
- Scrub the video by dragging within the Player Controls bar to the exact position you want.
- Click inside the Player Controls bar, as shown highlighted in red within Figure 2, below, and then use the Move Forward and Move Back buttons, as shown highlighted in blue within Figure 2, to fine-tune your position.
- Following any of the above three ways, ascertain the position on the Player Controls bar where you want to add a Bookmark, as shown Figure 2, below.
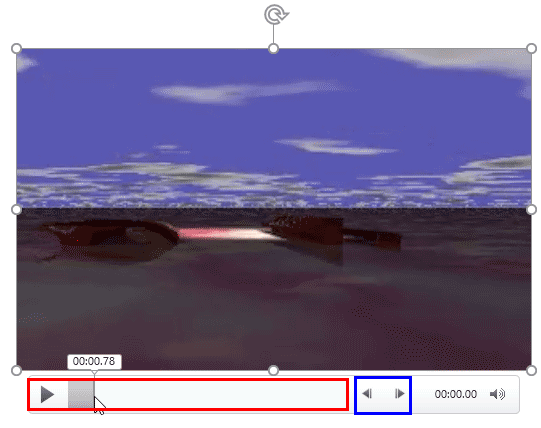
Figure 2: Video paused to add a Bookmark - Now select the Video Tools Playback tab in the Ribbon, and click the Add Bookmark button, as shown highlighted in red within Figure 3, below.
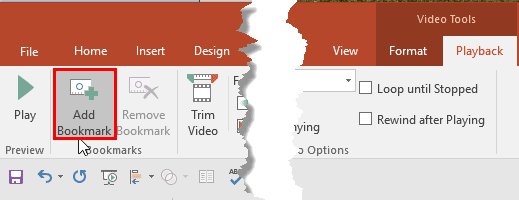
Figure 3: Add Bookmark button within the Bookmarks group - This step adds a Bookmark, represented by a yellow dot on the video timeline within the Player Controls bar to indicate the bookmark location, as shown highlighted in red within Figure 4, below.
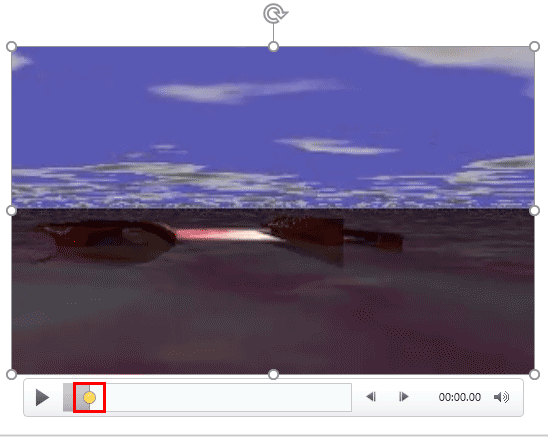
Figure 4: Bookmark is added on the video time line within the Player Controls bar - Once you start playing the video to preview, or even if you scrub again, you will find that your Bookmark added in the preceding step shows a white dot rather than a yellow dot, as shown in Figure 5, below. This indicates that the Bookmark is no longer selected. To select it again, just click on the white dot, which will turn yellow again to indicate that it has been selected.
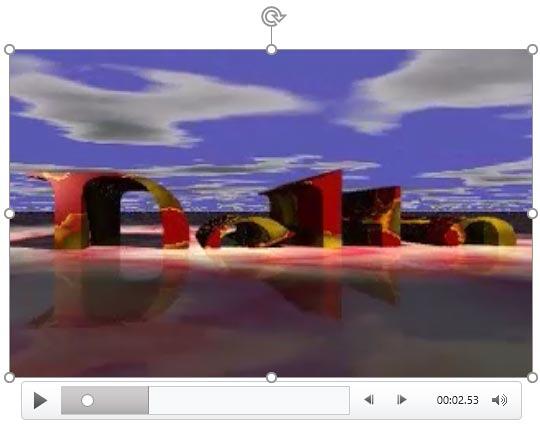
Figure 5: Bookmark no longer active within the Player Controls bar - You can add as many Bookmarks as you like. The selected Bookmark is always highlighted with a yellow dot, as shown in Figure 6, below.
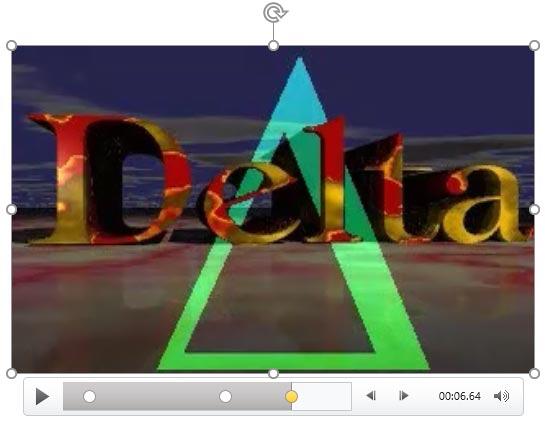
Figure 6: Selected Bookmark depicts a yellow dot within the Player Controls bar - Once you are done with adding bookmarks, you can play the slide in Slide Show view. Hover your cursor over the video clip to see the Player Controls bar, containing the Bookmarks. You can see the three bookmarks we added in Figure 7, below.

Figure 7: Bookmarks displayed within Slide Show view - Assuming you are still in Slide Show view, you can click on any of the Bookmarks to select it, and then click the Play button, as shown in Figure 8, below, to run the video clip from that position onwards.

Figure 8: Play video clip from the Bookmark position in Slide Show view - Make sure to save your presentation.


