Shapes may look basic or even primitive, but they are the building blocks of almost anything you create on your PowerPoint slides.
Fortunately, you are not deprived of choices because PowerPoint provides plenty of shapes, neatly categorized into
nine types. Among all the shape types, Action Buttons behave
differently, these are essentially rectangular shapes that are used as navigation aids to navigate between slides, or even another
presentation, document, or a web URL. You insert an Action Button in almost the same way as you insert any other shape:
- Launch PowerPoint 2013 for Windows. Most of the time PowerPoint will open
with a new slide in a presentation that you may use in this tutorial. Alternatively, you can open any existing presentation and navigate to the slide
where you want to add an Action button.
- Select the Insert or Home tab of the
Ribbon, and then click the Shapes button to access the
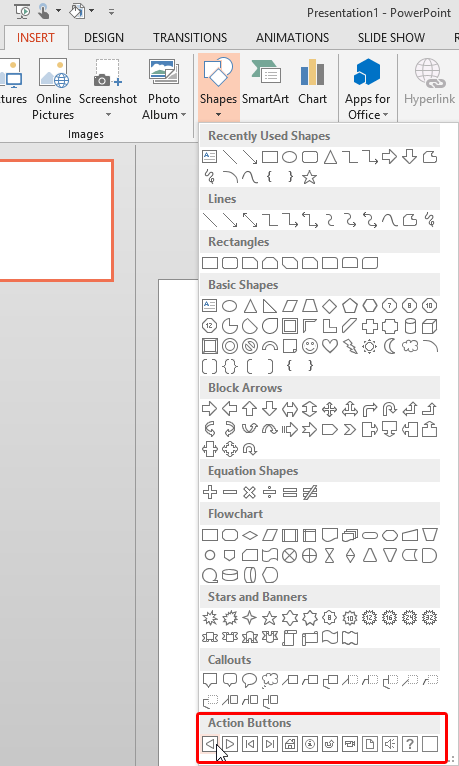
Shapes drop-down gallery that you can see in Figure 1.

Figure 1: Action Buttons category within the Shapes drop-down gallery- Within the Shapes drop-down gallery, the bottom most category is called
Action Buttons (highlighted in red within Figure 1, above) in which
you will find 12 variants of Action Buttons that serve different, default purposes. While some Action Buttons sport icons that
remind you of VCR style Play, Rewind, or Forward buttons, others include
iconography for concepts such as Home, Sound, Help, Information, etc.
- Click to select the Action Button of your choice, as shown in Figure 1 above. This will
change the cursor to a cross hair as shown in Figure 2.

Figure 2: Cursor changes to a cross hair to indicate shape insertion mode- Place this cursor on your slide where you want to insert
the selected Action Button (refer to Figure 2 above). Now, either click once on the slide to place the Action Button,
or click and drag on the slide to create an instance of the Action Button in the size you desire. As soon as the Action Button is placed
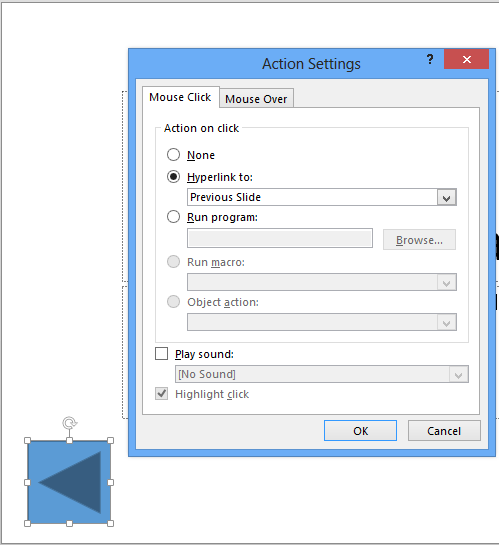
on the slide, the Action Settings dialog box pops up, as shown in Figure 3.

Figure 3: Action Settings dialog box appears when an Action Button is inserted on the slide- Within the Action Settings dialog box, you can change the
default behavior of the inserted Action Button.
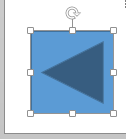
For now, just close the dialog box by clicking the OK button. Notice the new Action Button on your slide, as shown in
Figure 4.

Figure 4: Action button inserted- Since an Action Button is essentially a shape, you can change its appearance by using techniques explained within
the PowerPoint Shapes and the
Fills, Lines, and Effects sections on this site.
- Save your presentation.


