You have already explored what a digital signature is, and how a digital signature can be important for use in PowerPoint presentations. To digitally sign a presentation, you need a digital certificate.
Follow these steps to acquire or create digital signatures in PowerPoint 2013 for Windows:
- Launch PowerPoint, and open any existing presentation that you want to add a digital signature to. If you made any changes to your slides, do save your presentation before you proceed further.
- Access the File menu, and choose the Info option to get to Backstage view, as shown in Figure 1, below. Thereafter, select the Protect Presentation option to bring up a small drop-down menu, as shown in Figure 1. From the drop-down menu, select the Add a Digital Signature option, as shown highlighted in red within Figure 1.
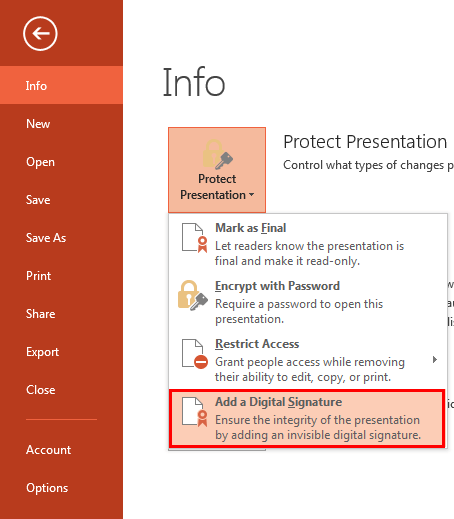
Figure 1: Add a Digital Signature option selected- If you don’t have a digital signature installed, you may see a message window, as shown in Figure 2, below. You can click the Yes button to learn how you get a digital signature. For now, though, click the No button. You can even shut down PowerPoint, as we explain how you can create a basic digital signature for free using tools provided as part of Microsoft Office.

Figure 2: Do you want to get a digital signature?- Now, access the folder where you installed Microsoft Office. This is usually C:\Program Files\MicrosoftOffice\Office15, but you could have installed it in another location. Within this folder, you will find a program called Selfcert.exe. Run this program.
- You will see the Create Digital Certificate dialog box, as shown in Figure 3, below.
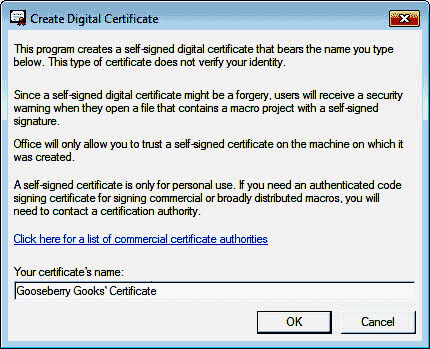
Figure 3: Create a digital certificate- Provide a name for your certificate. For example, we called this certificate Gooseberry Gooks’ Certificate, as shown in Figure 3. Click the OK button, and you will see a message window that says your certificate is created, as shown in Figure 4, below.
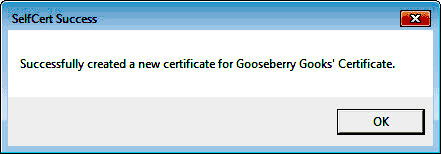
Figure 4: Certificate Created- Now, launch PowerPoint, open the presentation file that you want to sign with a certificate. Then, bring up the Info tab within Backstage view, as shown in Figure 1, previously on this page. Next, choose the Protect Presentation | Add a Digital Signature option. You will see the Sign dialog box, as shown in Figure 5, below.
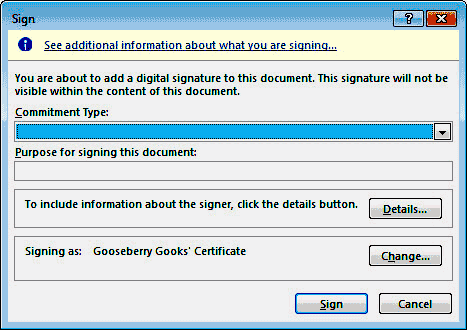
Figure 5: Sign your presentation file- Let us now explore the options within the Sign dialog box:
Commitment Type
- Clicking this box reveals a drop-down list that shows options, as shown in Figure 6, below.
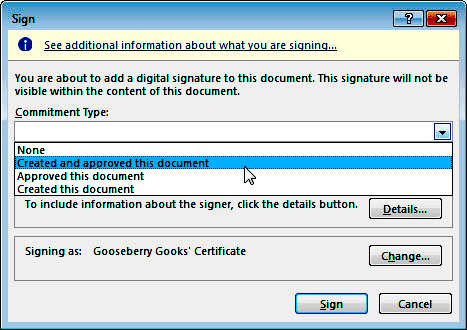
Figure 6: Choose your commitment type-
None
- Provides no commitment.
Created and Approved this document
- You confirm that you created and approved this presentation.
Approved this document
- You confirm you approved this presentation (someone else created this presentation).
Created this document
- You confirm you created this presentation.
Purpose for signing this document
- You can type a small phrase or sentence about your purpose for creating this presentation.
Details
- Clicking this button brings up the Additional Signing Information dialog box, as shown in Figure 7, below. You can type contact info within this dialog box.
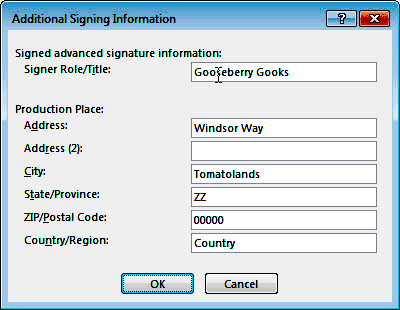
Figure 7: Add more detailsChange
- Click this button to bring up the Windows Security dialog box, as shown in Figure 8, below. If you have more than one digital signature, you can choose the signature you want to use.
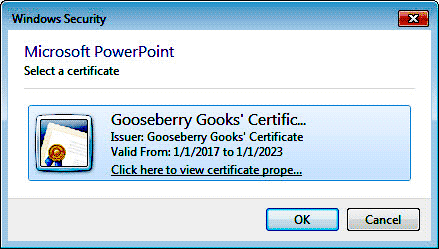
Figure 8: Choose a digital signature- Once done, click OK to get back to the Sign dialog box and click the Sign button, as shown in Figure 5, previously on this page.
- This action opens a Signature Confirmation window, as shown in Figure 9, below. Click the OK button to proceed.
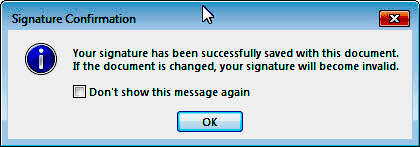
Figure 9: Sign dialog box


